Integrating your Zesty.io site with Google Analytics is paramount to understanding site traffic and continuous optimization to achieve growth. This is a very easy process, and we’ll walk you through two ways to integrate your Google Analytics account with Zesty.io.
Prefer following along? Check out our Guide on YouTube.
Method 1: Authenticating through the Zesty.io Dashboard
Time: < 1 minute
What you’ll need:
Zesty.io login and instance access
Google Analytics login and access
This method is the fastest and easiest, but does require immediate access to your Google Analytics account. If you’re managing a website for a client, this may not be possible.
Step 1: Log in to your Zesty.io account and find the instance you’d like to connect with your Google Analytics account.
Step 2: In the main “Content” pane, you’ll see a dashboard that looks like this:

After clicking the green button that says “CLICK HERE TO AUTHENTICATE WITH GOOGLE,” a popup will appear.
Step 3: In the pop-up modul, allow Zesty.io access to the desired Google Account. Press Allow.
Congratulations! You’re authenticated! Please allow 48 hours for data to resolve fully in the Zesty.io dashboard.
Method 2: Manually Connecting Google Analytics to Zesty.io
Time: < 3 minutes
What you’ll need:
Zesty.io login and instance access
Google Analytics Urchin ID
Google Profile ID
This method is takes just a few more steps, but can be done by someone who does not have a Google account that directly links to the Analytics account that needs to connect to the instance.
Step 1: Log in to your Zesty.io account and find the instance you’d like to connect with your Google Analytics account.
Step 2: Navigate to the the SCHEMA tab. You’ll see three tabs underneath the main navigation. Select Instance Settings.
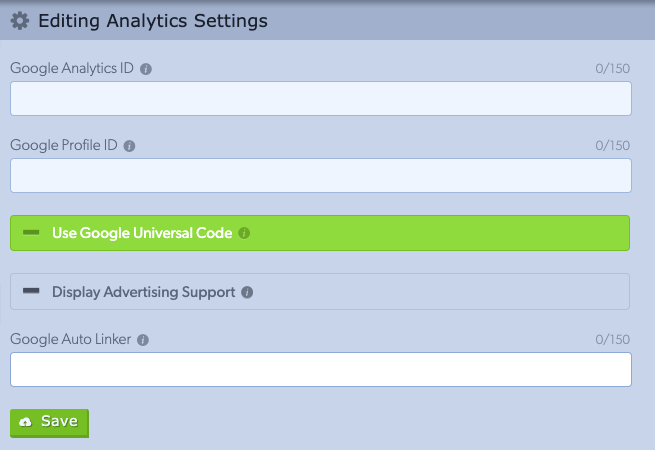
Step 3: On the left-hand side, you’ll see a menu. Select Analytics. If you’re not already authenticated to Google Analytics, it should be blank:

Step 4: In a separate browser, navigate to the Google Analytics account you’d like to connect. (This can be done with read-only permission.) Navigate to the Admin button on the bottom left-hand corner.
Step 5: Find your property in the middle column. Click Tracking Info, and then Tracking Code.
Step 6: Copy the Tracking ID you’ll find toward the top of the screen. The Tracking ID starts with UA. Paste the Tracking ID into the field in Zesty.io labeled Google Analytics ID.
Step 8: In Google Analytics, navigate back to the screen we were on in step 5. In the middle column, you’ll see User Management.
Step 9: In the far right, you’ll see 3 dots next to your user. Select View User’s Account Details. Navigate down to the property that you’re trying to connect to Zesty.io, and copy the 9-digit number. Paste the ID into Zesty.io under the Google Profile ID.
Step 10: Press Save and hard refresh. You should be all connected and your dashboard should be pulling in data to Zesty.io. Please allow 48 hours to resolve all data in the Zesty.io dashboard.
Having issues navigating Google Analytics? Check out their documentation here.