This guide will help you get started in adding a blog to your Zesty.io instance in 10 minutes.
Step 1: Decide on Design
Before we get started, it’s important to have a design in mind. If you’re working with a framework, excellent; they usually have great starting points. If you’re building from scratch, consider your design in your build. For our purposes, we’re going to feature the three most recent blog articles on our homepage.

You will also have to consider the article page layout, as well as category pages. For our purposes we’re going to design them like this:
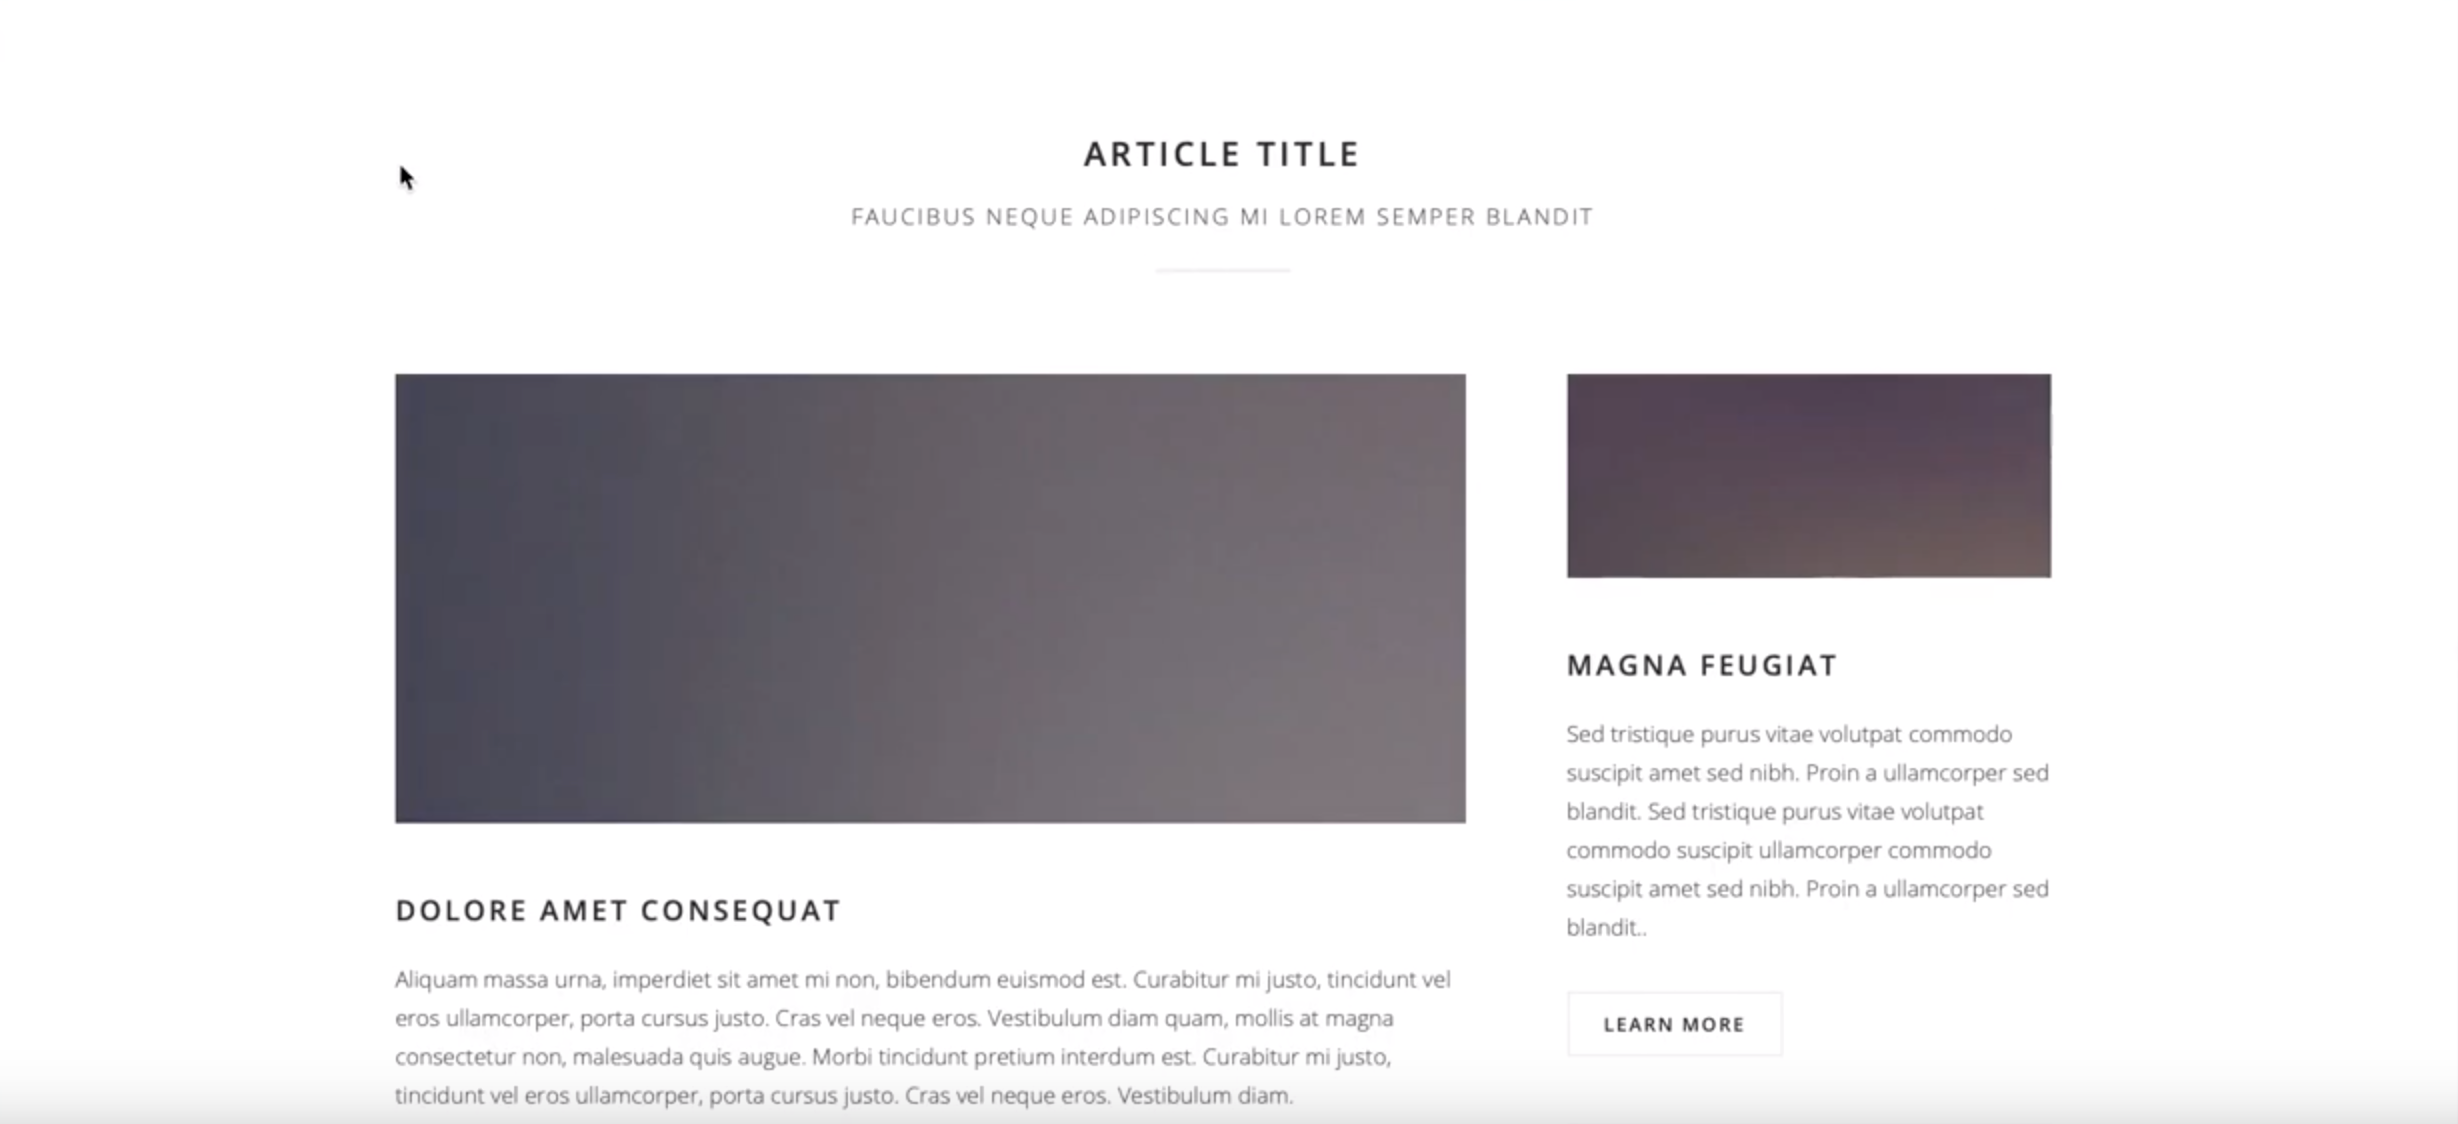
Our basic article page design.
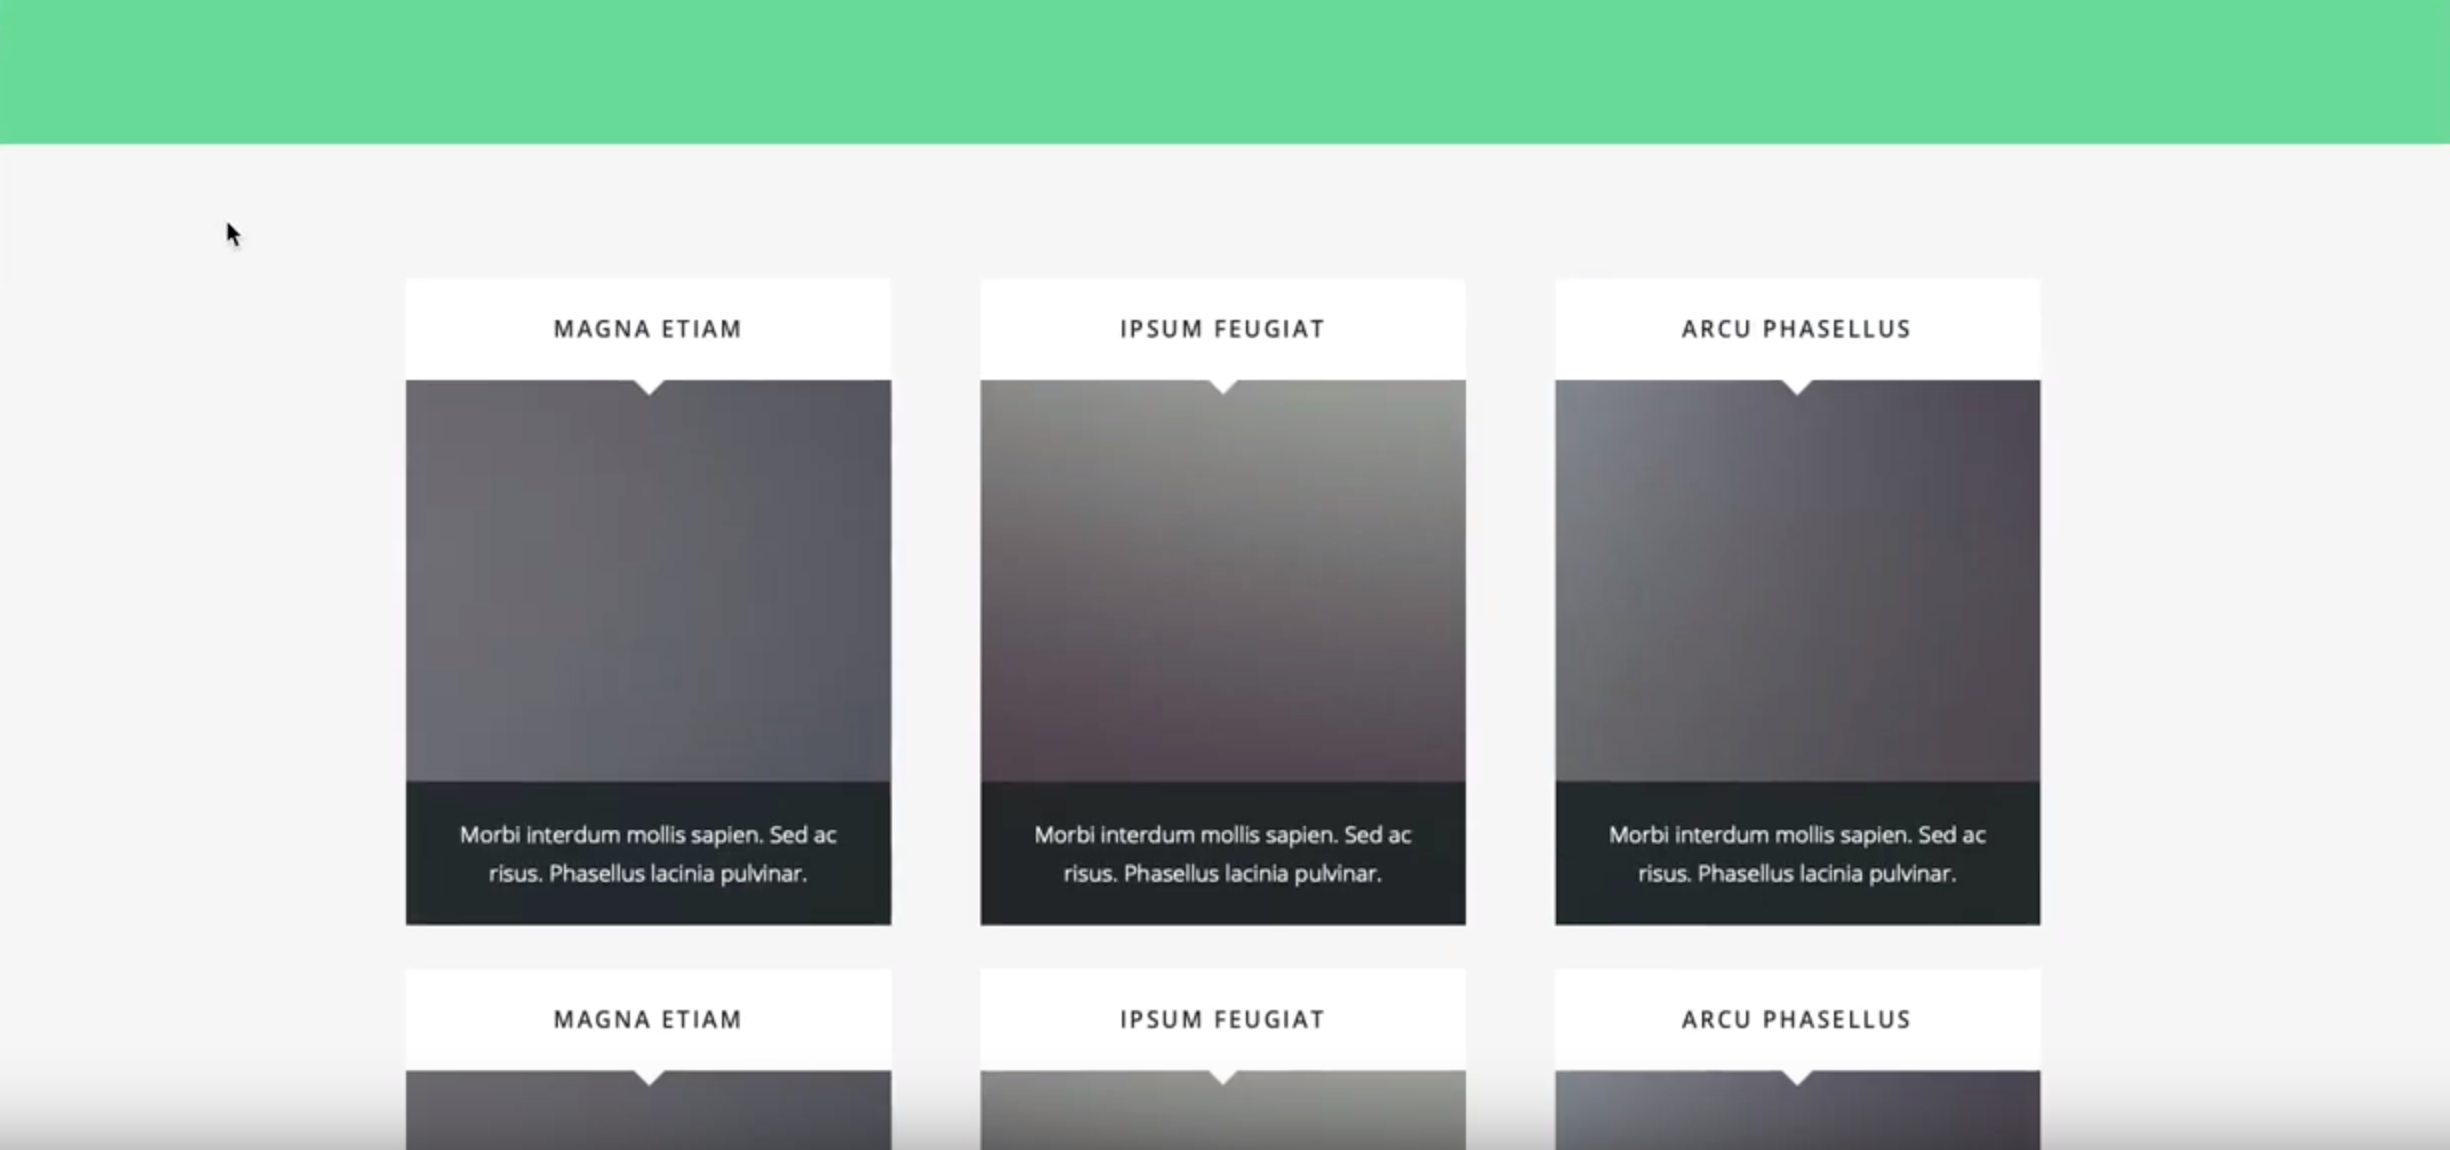
Our basic tags or categories page design.
Step 2: Create the Schema
If you’ve built in Zesty.io before, you’ll know that you can build an entirely custom content schema for your blog. Let’s get started with:
The Blog Page
This will be a Single Page Model in Zesty.io, and will be your /blog/ route in your URL. This will also be the parent for all of your blog articles. Under the Schema tab in the Manager, create a Single Page Model with the appropriate blog name. It should look something like this:
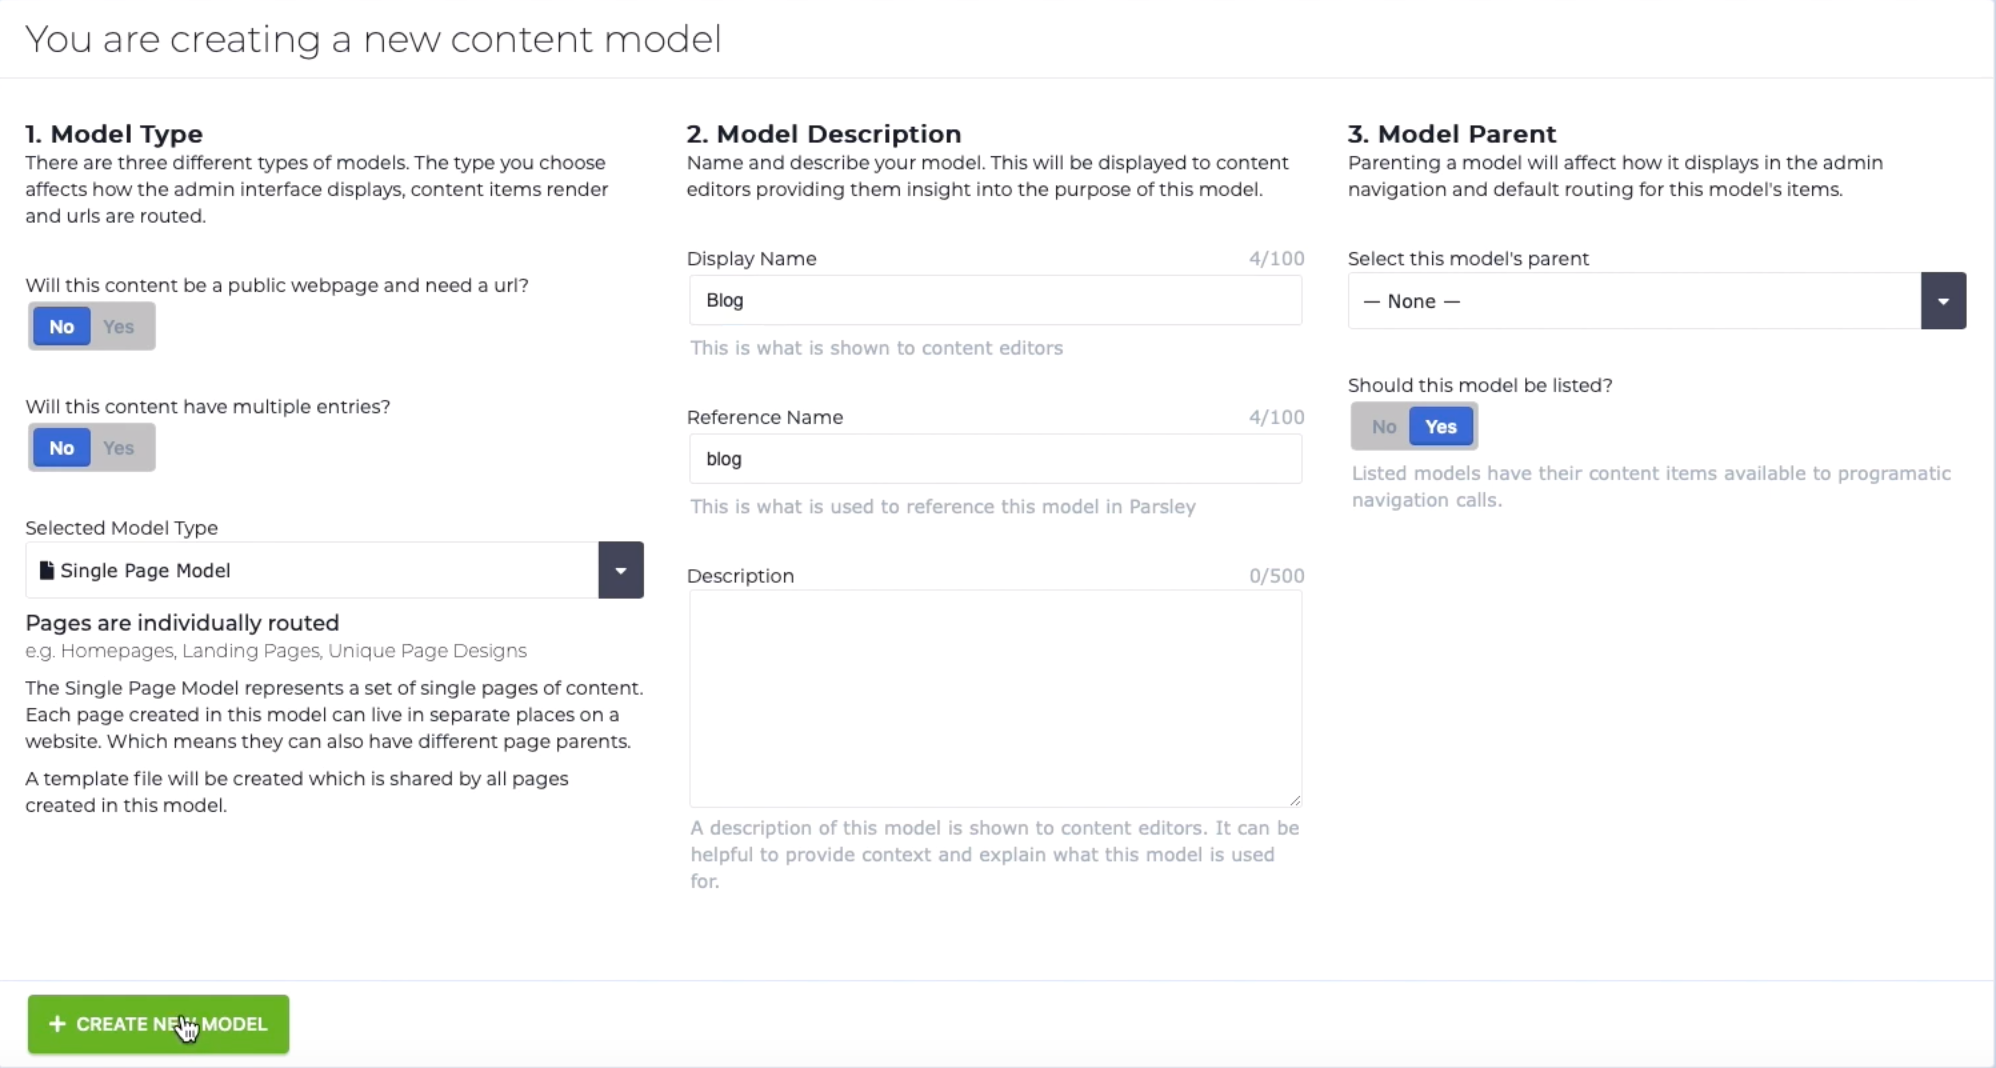
After you create this new model, all we’ll need for now is the Title of the page: the blog articles will populate on this page separately. For now, add a Text field called “Title” for the title of the page.
Congratulations! You’ve created the parent page for the blog.
Categories
Now let’s create the schema for our Categories. This will be a group of pages, so we’ll create a Multi Page Model, title it appropriately, and Parent the page to Blog.
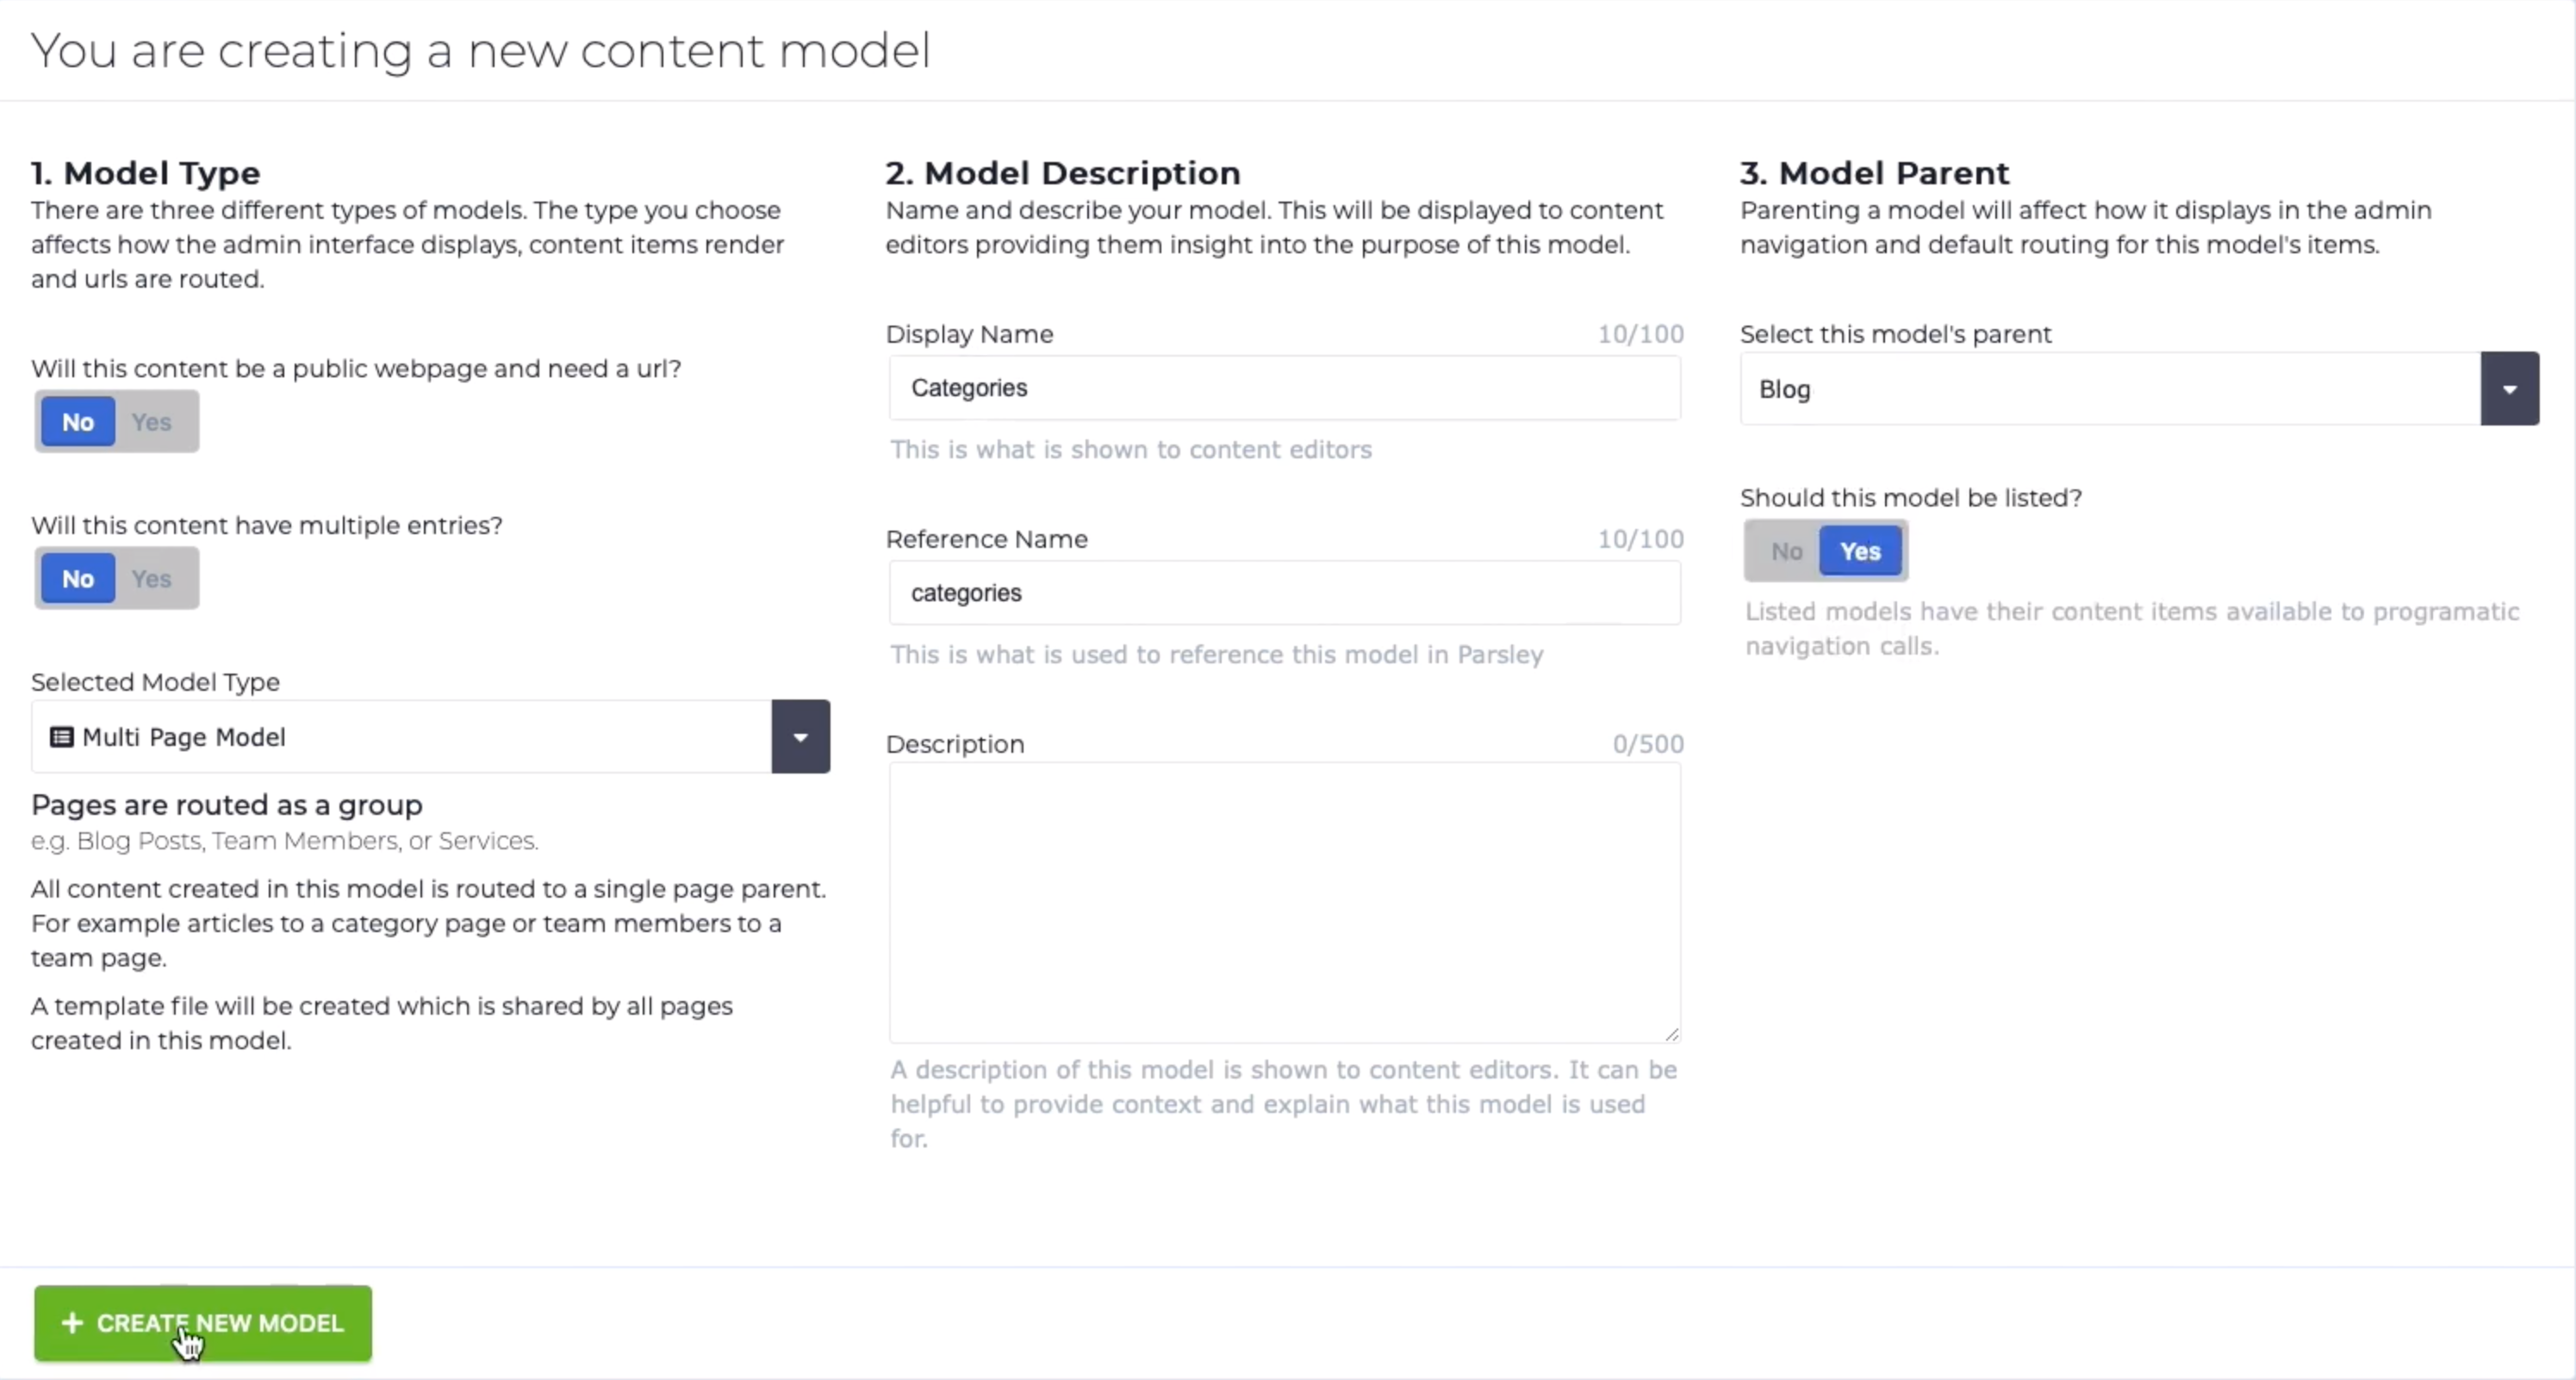
Great! For the fields, we’ll keep it simple: let’s just create a Text Field that will be the Name of the Category, and you’re good to go for your categories!
Articles
Now for the really fun stuff: let’s create the schema for our blog articles. We’ll want to create a Multi Page Model with the name Articles, and make sure it’s Parented to the Blog.
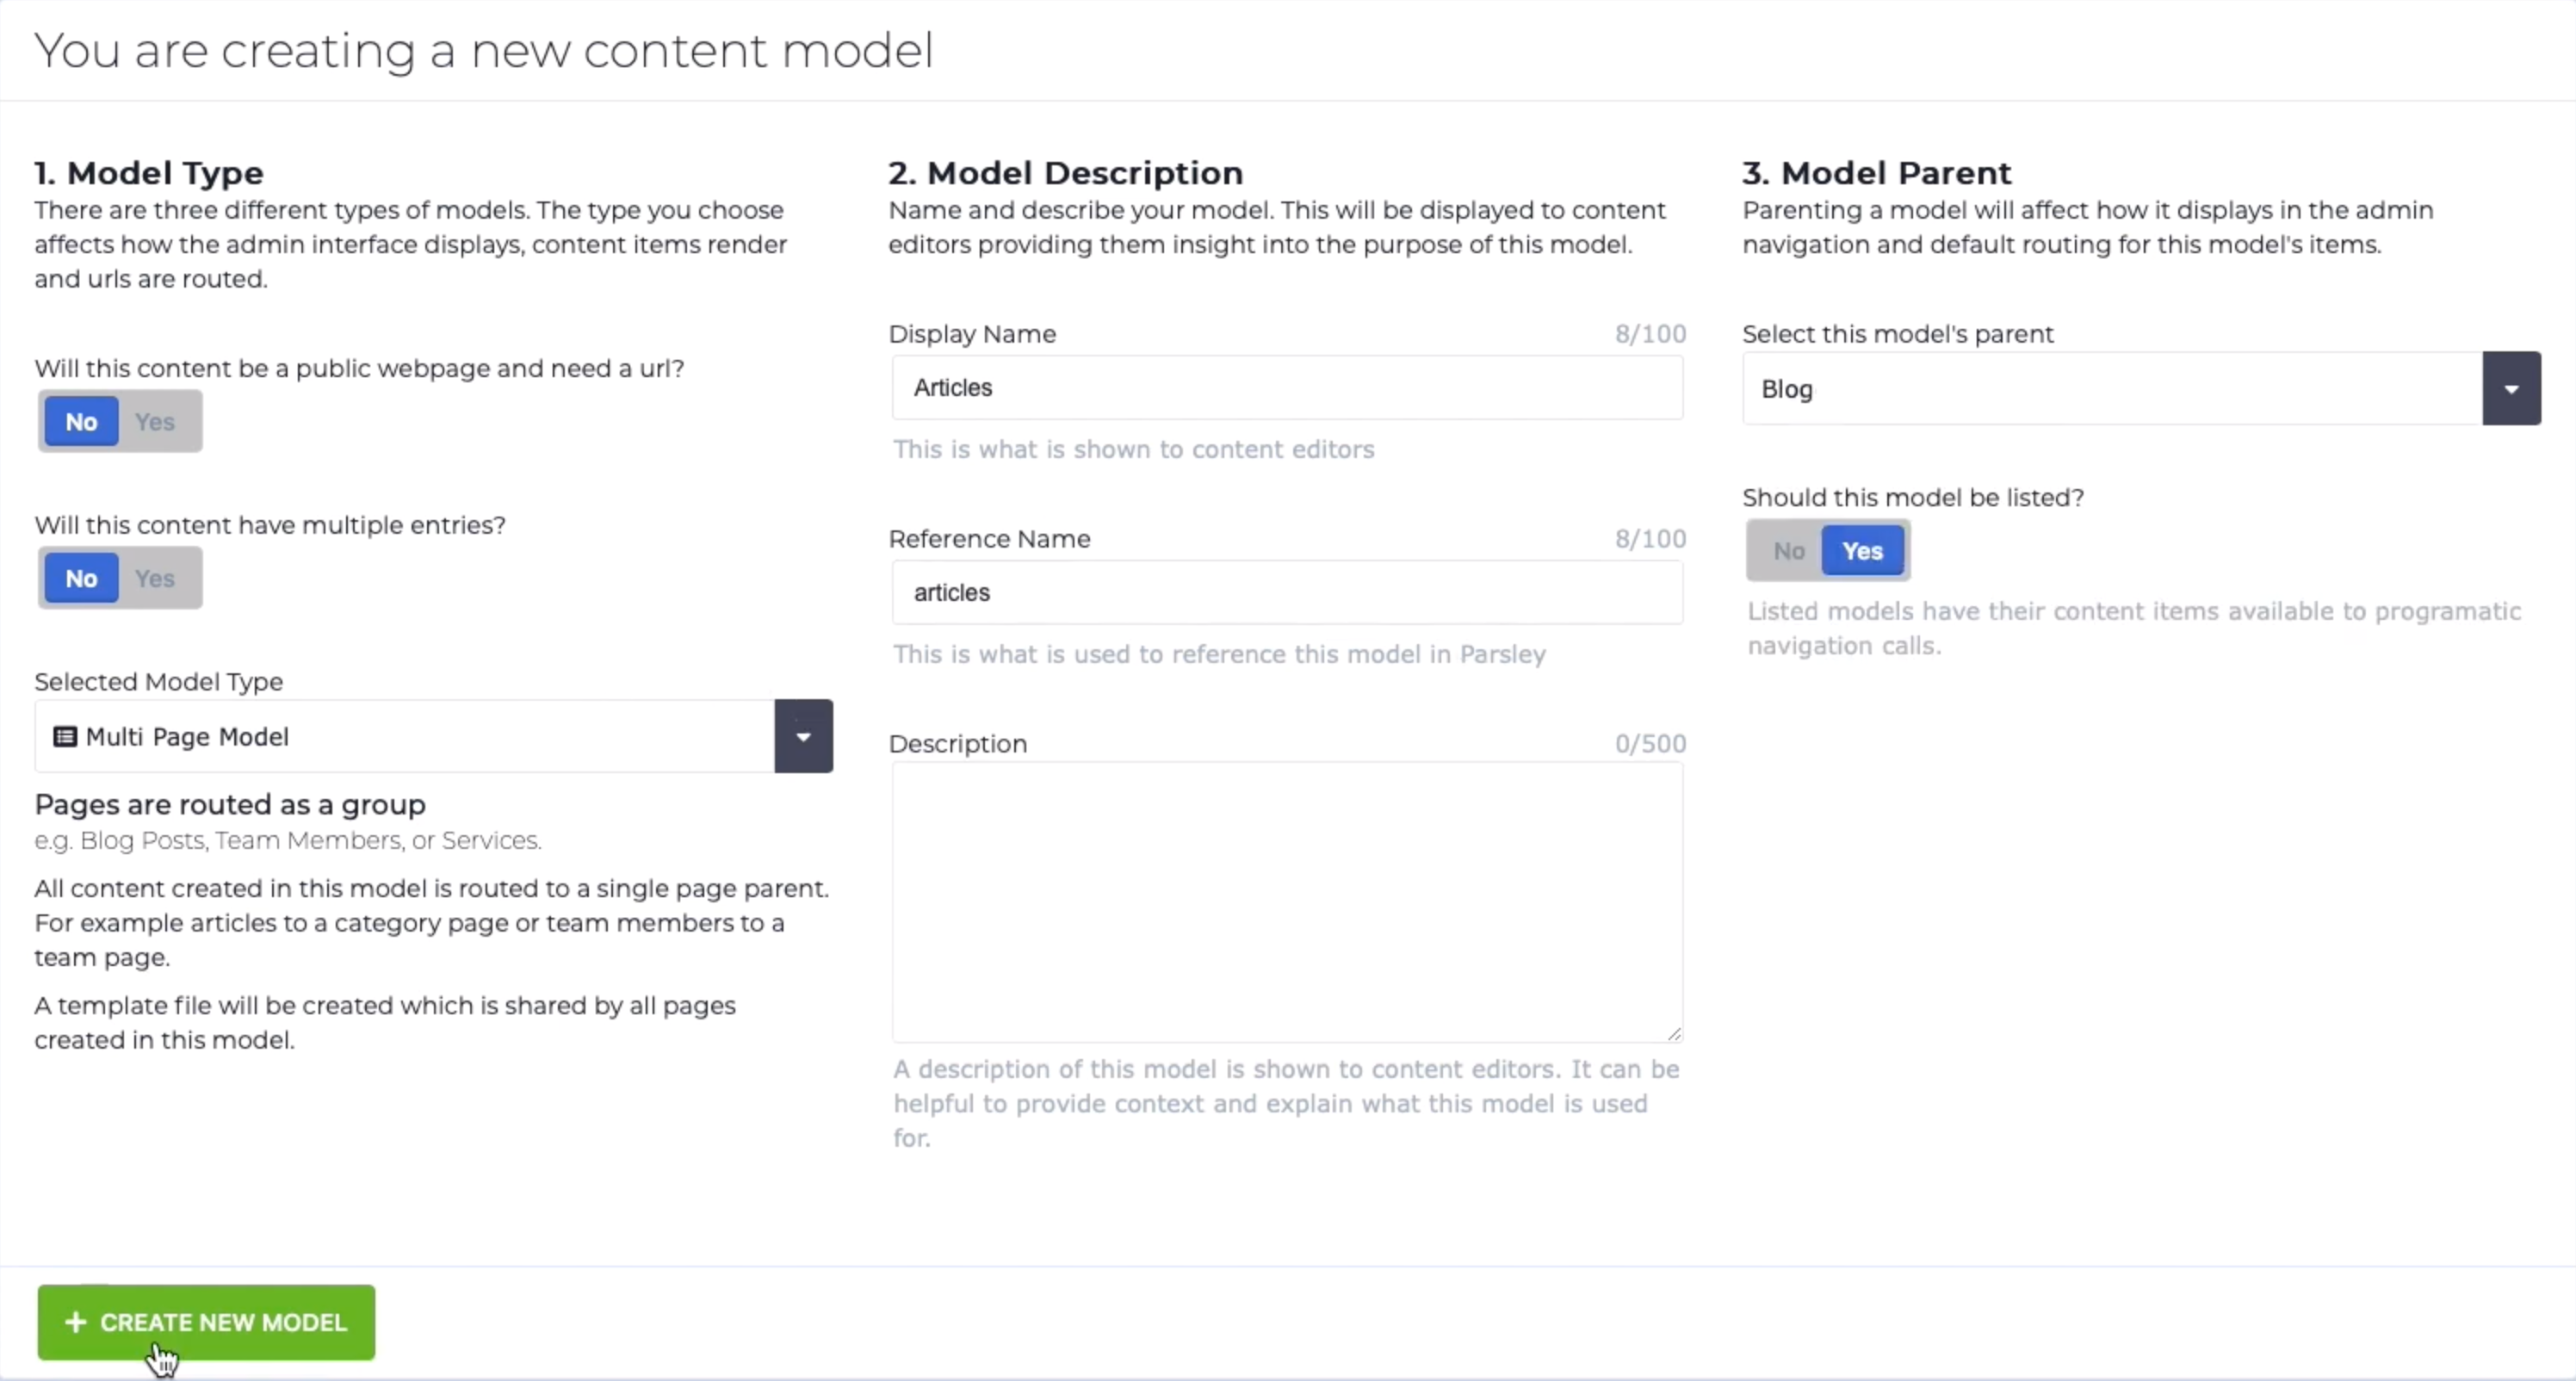
For the fields, we’ll create:
Title: text field
Subtitle: text field
Main image: media field
Article Content: WYSIWYG field
Category Relationship: One-to-many field. Be sure to select “Categories” as the relationship we’re creating, and display the Category Name. With a one-to-many field, we can tag an article with multiple categories.
Date: date picker field
And voila! You’ve created all of the schema you’ll need for a blog. Of course you can add more advanced functionality, such as links to videos, sort orders, and more: but for this tutorial, we’ll keep it simple.
Step 3: Populate Content
In order to preview everything as we code, take a moment to populate some of your pages with content! If you haven’t written any blog posts yet, that’s ok: you can always use Lorem Ipsum dummy text to create a few articles, and populate some of your images with stock images such as Pexels.
With Zesty.io, the possibilities are endless. Write as much content as you want, add links, photos, videos, whatever you want!
Step 4: Code the Blog
If you go to the Code tab of Zesty.io and select the Blog, Articles, or Categories pages, they’re all blank. That’s intended: we haven’t told Zesty.io how to display and style our content yet. If you’re a developer, you can use HTML, CSS, and Javascript to build these views. You’ll also need Parsley, Zesty.io’s templating language, to call in the content from the fields we created. You can view Parsley’s documentation at Zesty.org. The main parsley calls you’ll need are:
Blog Title: {{this.title}}
Blog content: {{this.content}}
And to create relationships, you’ll need more advanced Parsley functions like each loops and the findinset() function. Here’s an example of the code we used to generate the sidebar, which is an each loop to call 2 related articles that use findinset() to display other articles that share the same Category.
<section id="sidebar">
  {{each categories as relatedcategory find_in_set(z.zuid,'{this.categories'}) limit 2}}
  {{each articles as relatedarticle where find_in_set('{relatedcategory.zuid}',{relatedarticle.categories}) limit 1}}
      <section>
          <a href="#" class="image fit"><img src="image.jpg" alt=""></a>
          <h3>{{relatedarticle.title}}</h3>
          {{relatedarticle.content.subwords(20)}}...
           <footer>
             <ul class="actions>
                <li><a href="{{relatedarticle.getUrl()}}" class="button small alt">Read More</a></li>
            </ul>
         </footer>
      </section>
    <hr />
  {{end-each}}
  {{end-each}}
</section>
Once your blog is coded and styled to your liking, you’re all set! You can always preview your work before publishing by viewing your Current Preview. Once you’re ready to publish your blog to the world, make sure you publish both your Content and Code!
That’s all there is to it. Happy blogging!