iOS App Guide
Guide in setting up Zesty Instance and iOS App
Maintaining an iOS App can be extremely difficult and tricky. App Review times are typically 1-2 days and require excessive developer input (when all that's really being changed is an image or a string). Zesty.io allows developers to write their code once, and let marketers update the content continuously.
In this tutorial I'll be walking you through how to setup your Zesty.io instance and iOS App to allow the iOS App to get data from the Zesty.io instance.
Setting up the Zesty Instance
Creating the Instance
First, we'll need to create an instance (if you haven't already). Refer to guide: Create a New Instance
Configuring the Content
Once we open up the manager, we'll need to configure the content that we'll load from our iOS App.
Go to Schema and create a Set of Content Entries. Call it Coupons
Then add a few fields to load in, a Text Field called name, and a TextArea Field called description.
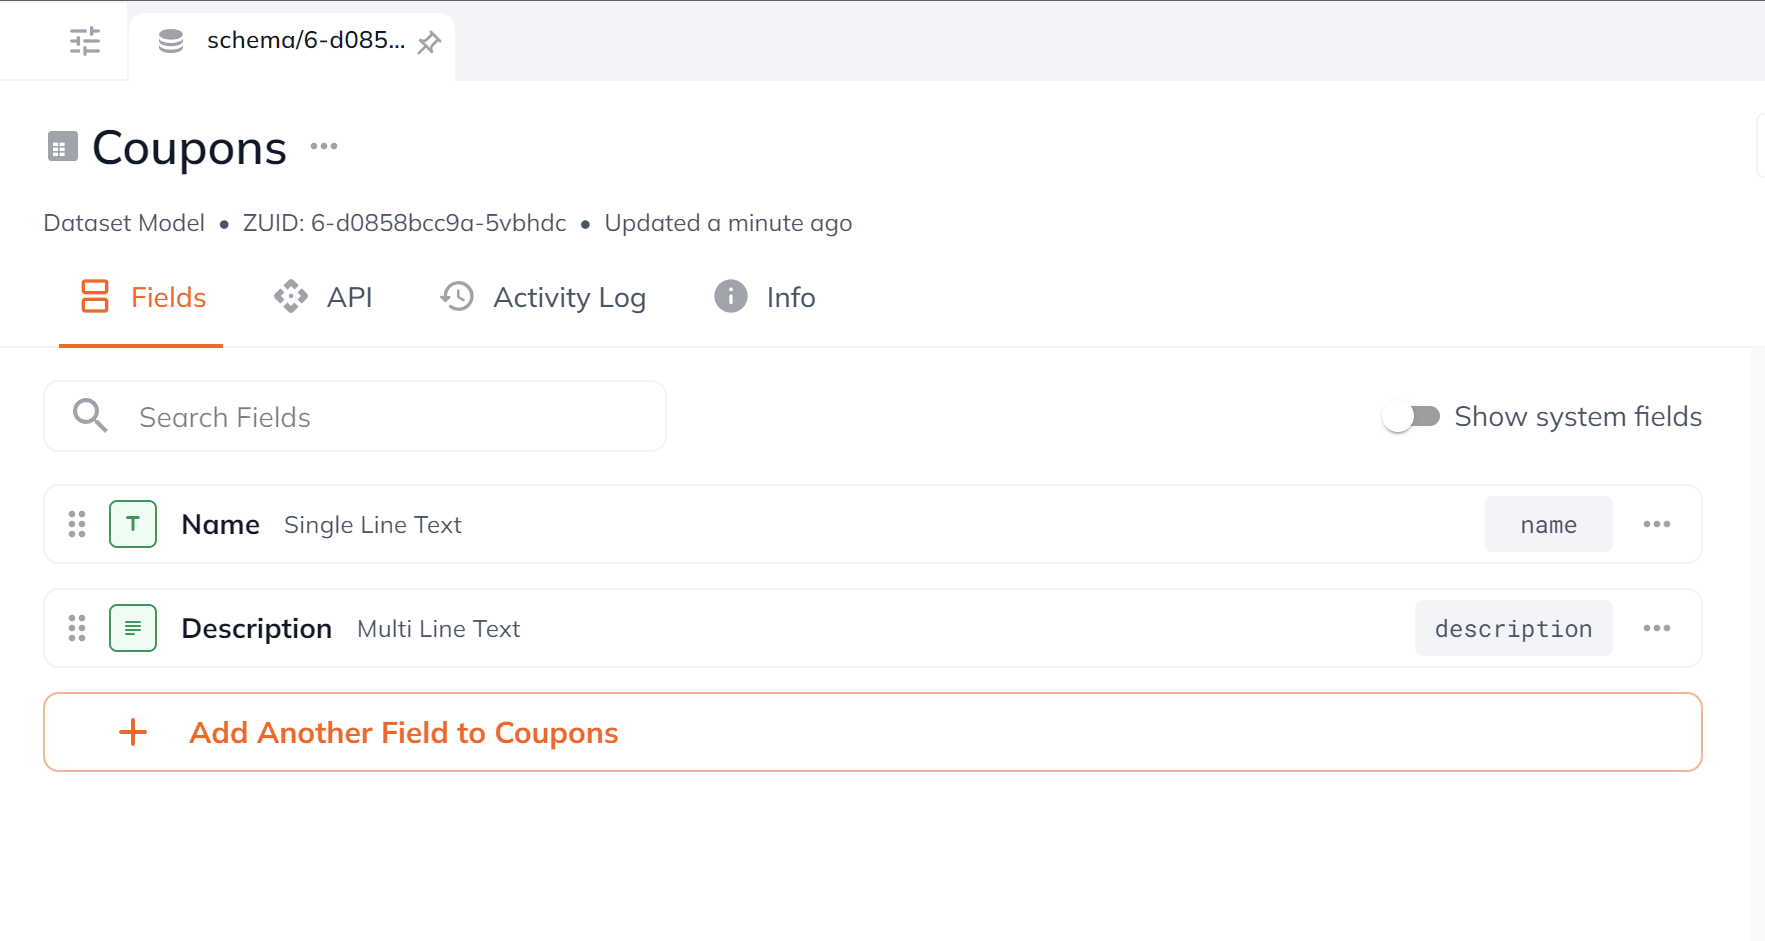
In the Instance Settings > Developer, enable Basic JSON Endpoints

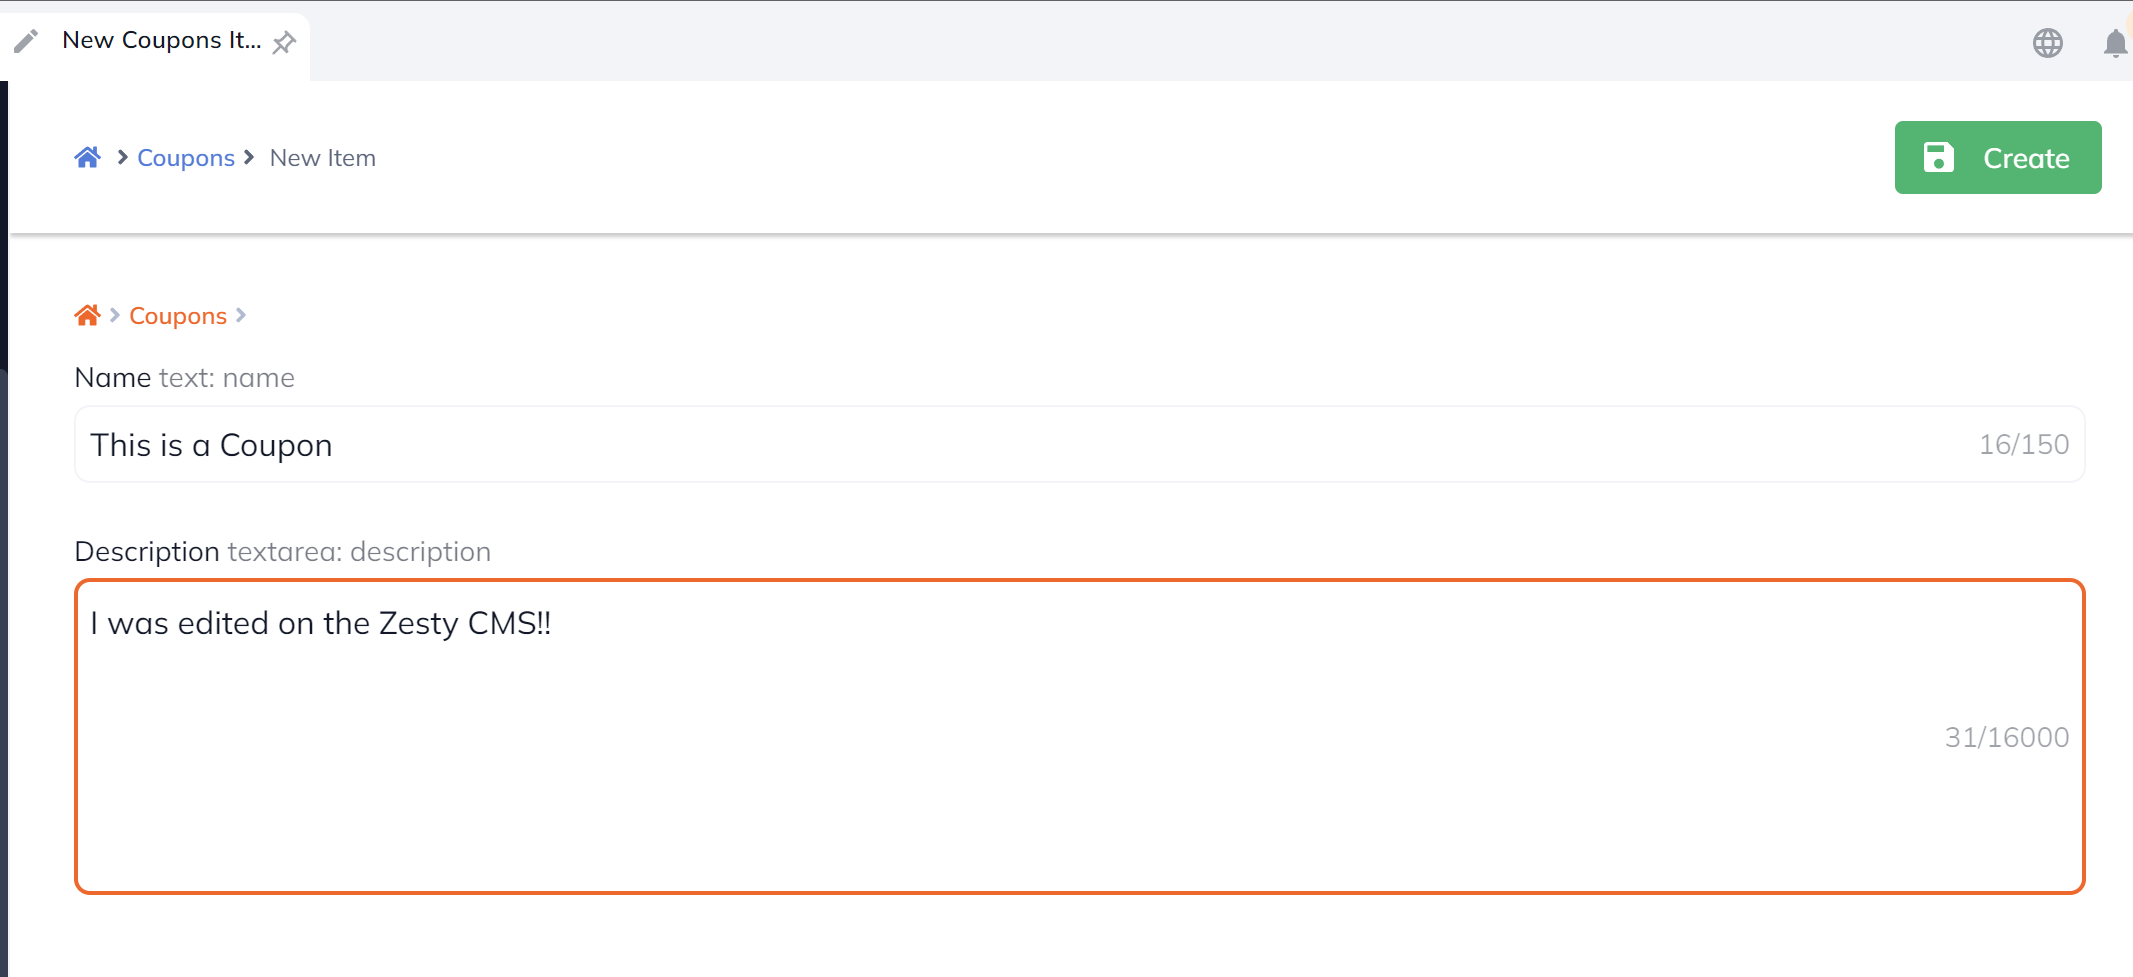
After saving, go to Content and we'll add an entry to our Coupons Dataset
Now that our Zesty Instance is created, we can start making our iOS App!
Making the iOS App
In order to make an iOS App, you'll first need to download Xcode, which also means that you'll need a Mac. After installing Xcode, you can move onto the next step, which involves actually creating the app and getting it setup.
Setting up your project and installing libraries
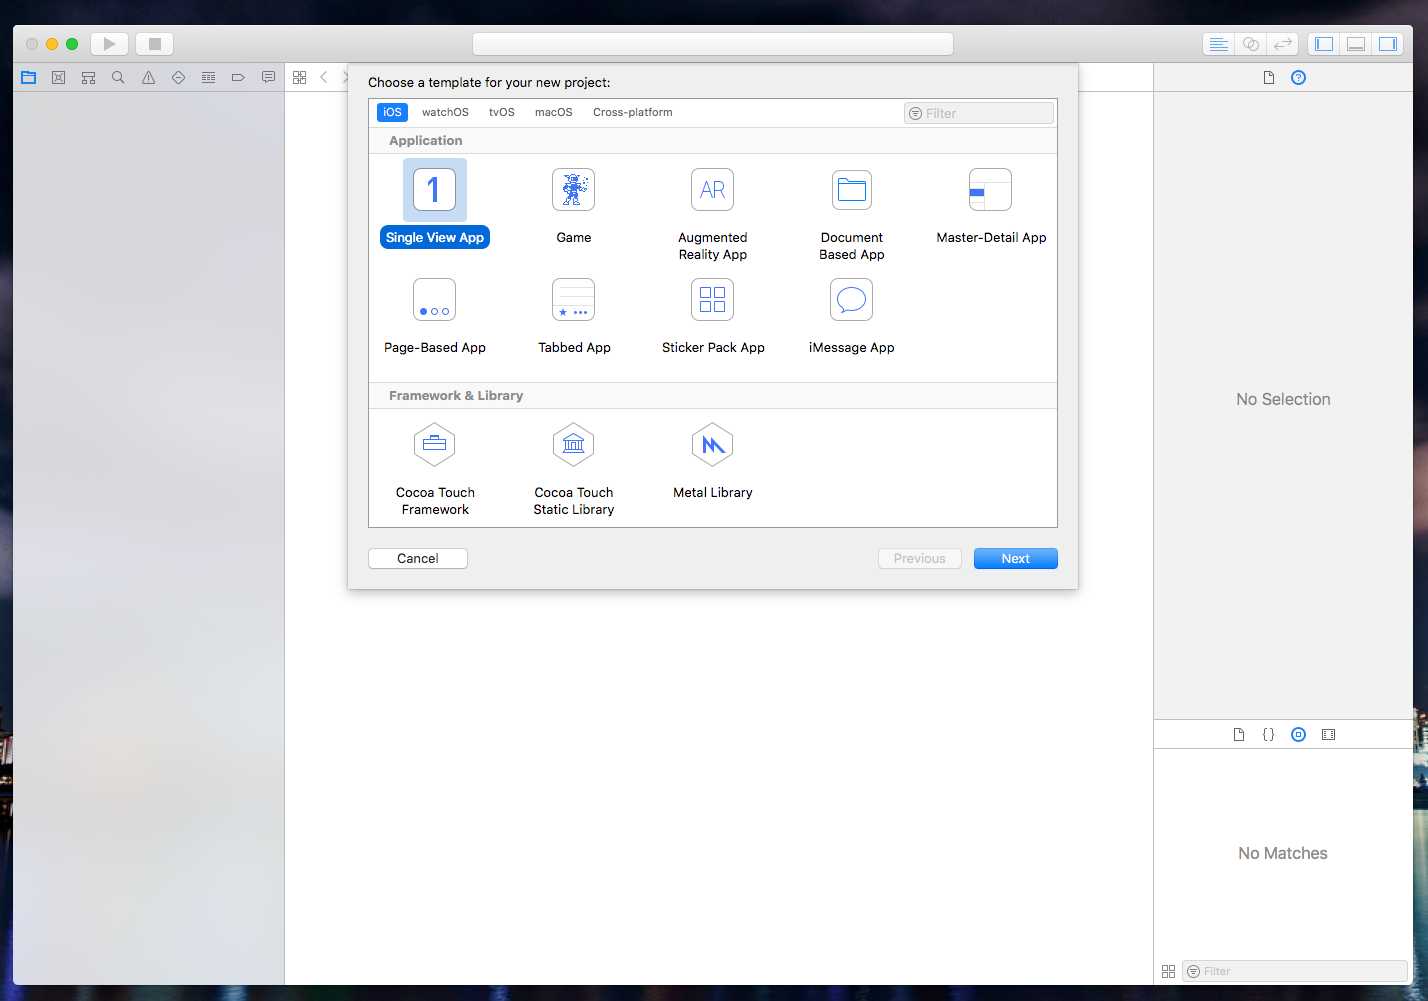
Open up Xcode and Create a New Xcode project (if you don't see this option, ⌘ ⇧N should also work).
For our purposes, we'll just create a Single View App (but you can choose any option you want for your project)
Call it whatever you'd like, and for the Organization Identifier, Apple typically recommends using a reverse domain id, so if your domain is example.com, enter in com.example. This will make sure you have a proper Bundle ID created.
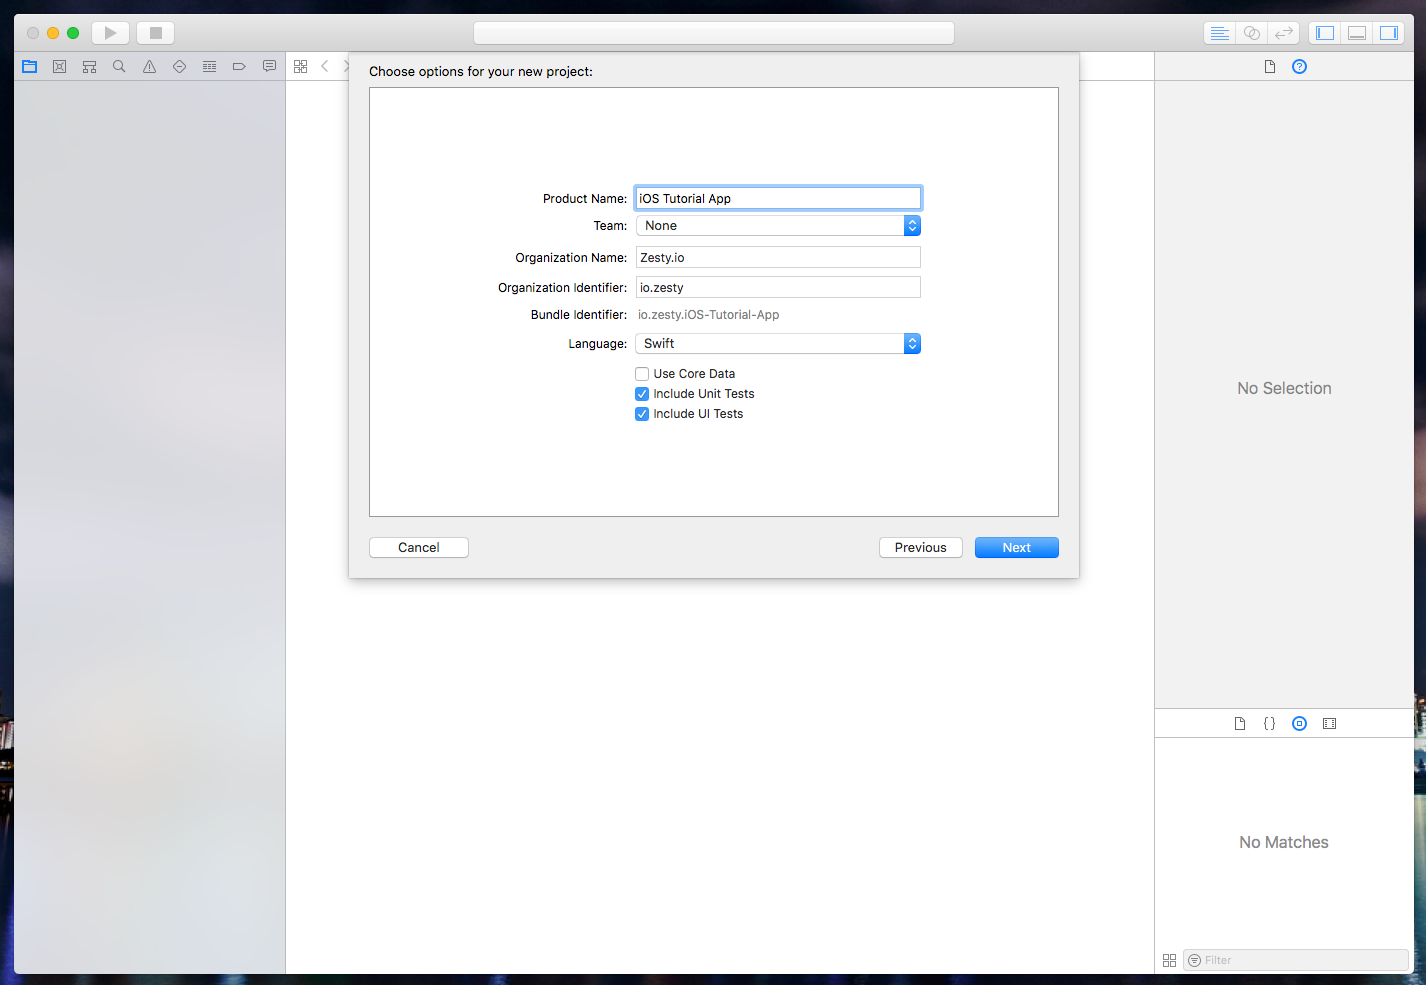
Hit Next, then create the project wherever you'd like. Additionally, if you'd like to use source control (Git [Github/Bitbucket], etc), make sure to specify that now.
Once you create your project, we're going to install some libraries.
We'll be using Cocoapods, which is an open source package manager for iOS Applications. Cocoapods will make sure that your project works properly, and it will also allow you to use the library that we created to streamline using Zesty in your product.
To do this, we'll need to create a Podfile
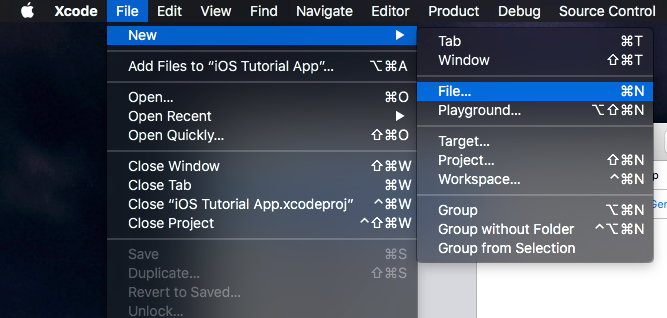
Go to File -> New -> File...
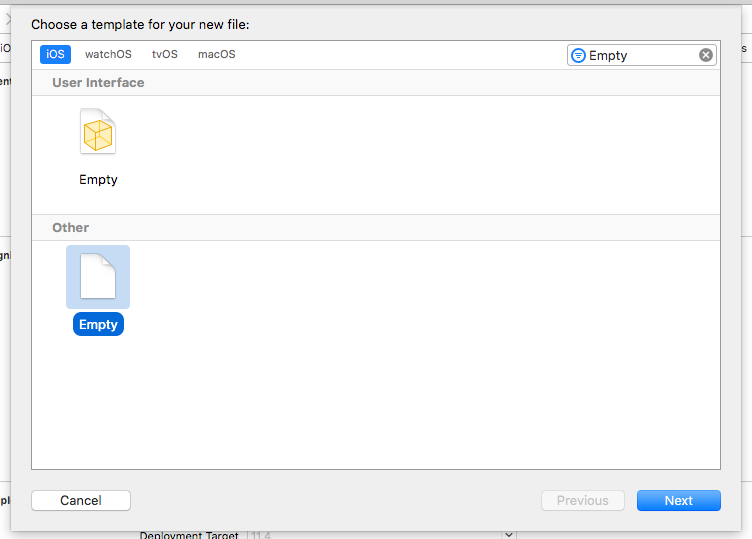
Choose Other -> Empty
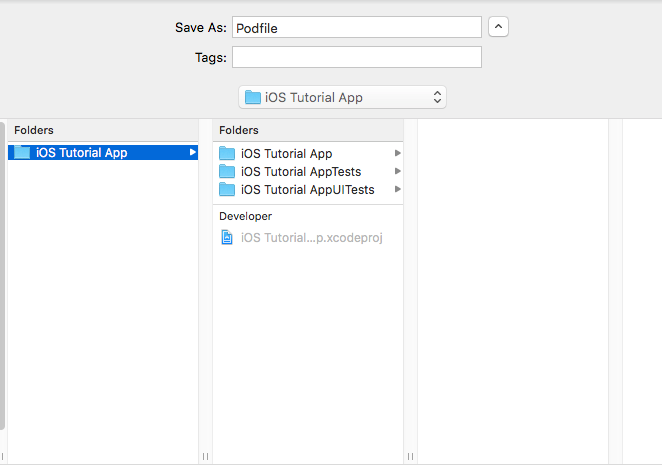
Call it Podfile, and store it at the base of your project directory, alongside your .xcodeproj file
Inside Podfile, paste in this code: (and replace iOS Tutorial App with the name of your Xcode Project Name
Save it, then close Xcode and open up the Terminal.
We'll now install the pods that we just specified in the Podfile
First, to install cocoapods, open up your terminal (Can be found in Launchpad or Spotlight) and enter in the following commands:
For macOS 10.11 and above (El Capitan+)
For macOS 10.10 and below
Sidenote: the --verbose flag is included so you can see the progress of each command, as these commands usually take a while to run.
Now, after Cocoapods has been installed, we'll navigate to your project's directory.
Note: If you're unfamiliar with terminal commands, simply open up a terminal window , type in cd, then hit space. Then drag the folder from Finder to the terminal and hit enter.
Once you've navigated to the directory, run pod install and sit back and watch all the libraries install. While they install, here's a quick overview what's being installed
- ZestySwiftContentEndpointWrapper : This Cocoapod allows easy retrieval of your Zesty data / endpoints without any hassle
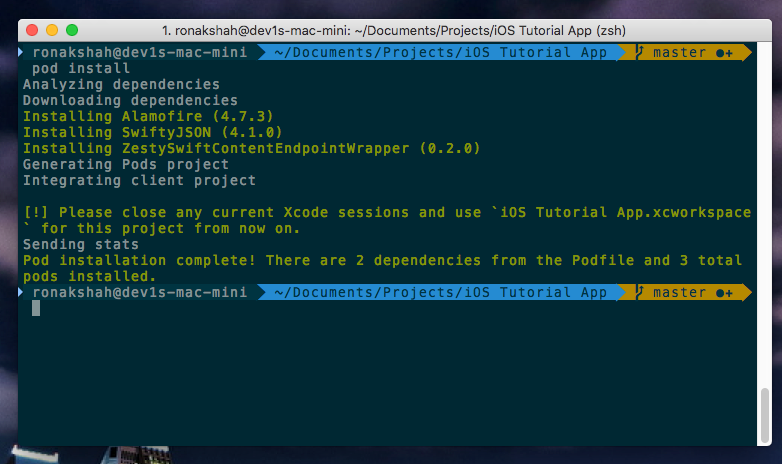
After running pod install, you may notice that an .xcworkspace file was created. This is now going to be the file that you open up when you want to work on your app. This is how Cocoapods integrates the libraries into your project.
Open up your xcode workspace (just double click on the .xcworkspace file in finder), and Build your project (⌘B). This will complete the setup of your Cocoapods. You may get an error about Code Signing. This is easily fixed, you simply need to add a team in your project settings.
Important: You must use the .xcworkspace file to make use of the Zesty Library!
Pulling Data from Zesty.io
Now that everything has been setup, we can pull our data from Zesty!
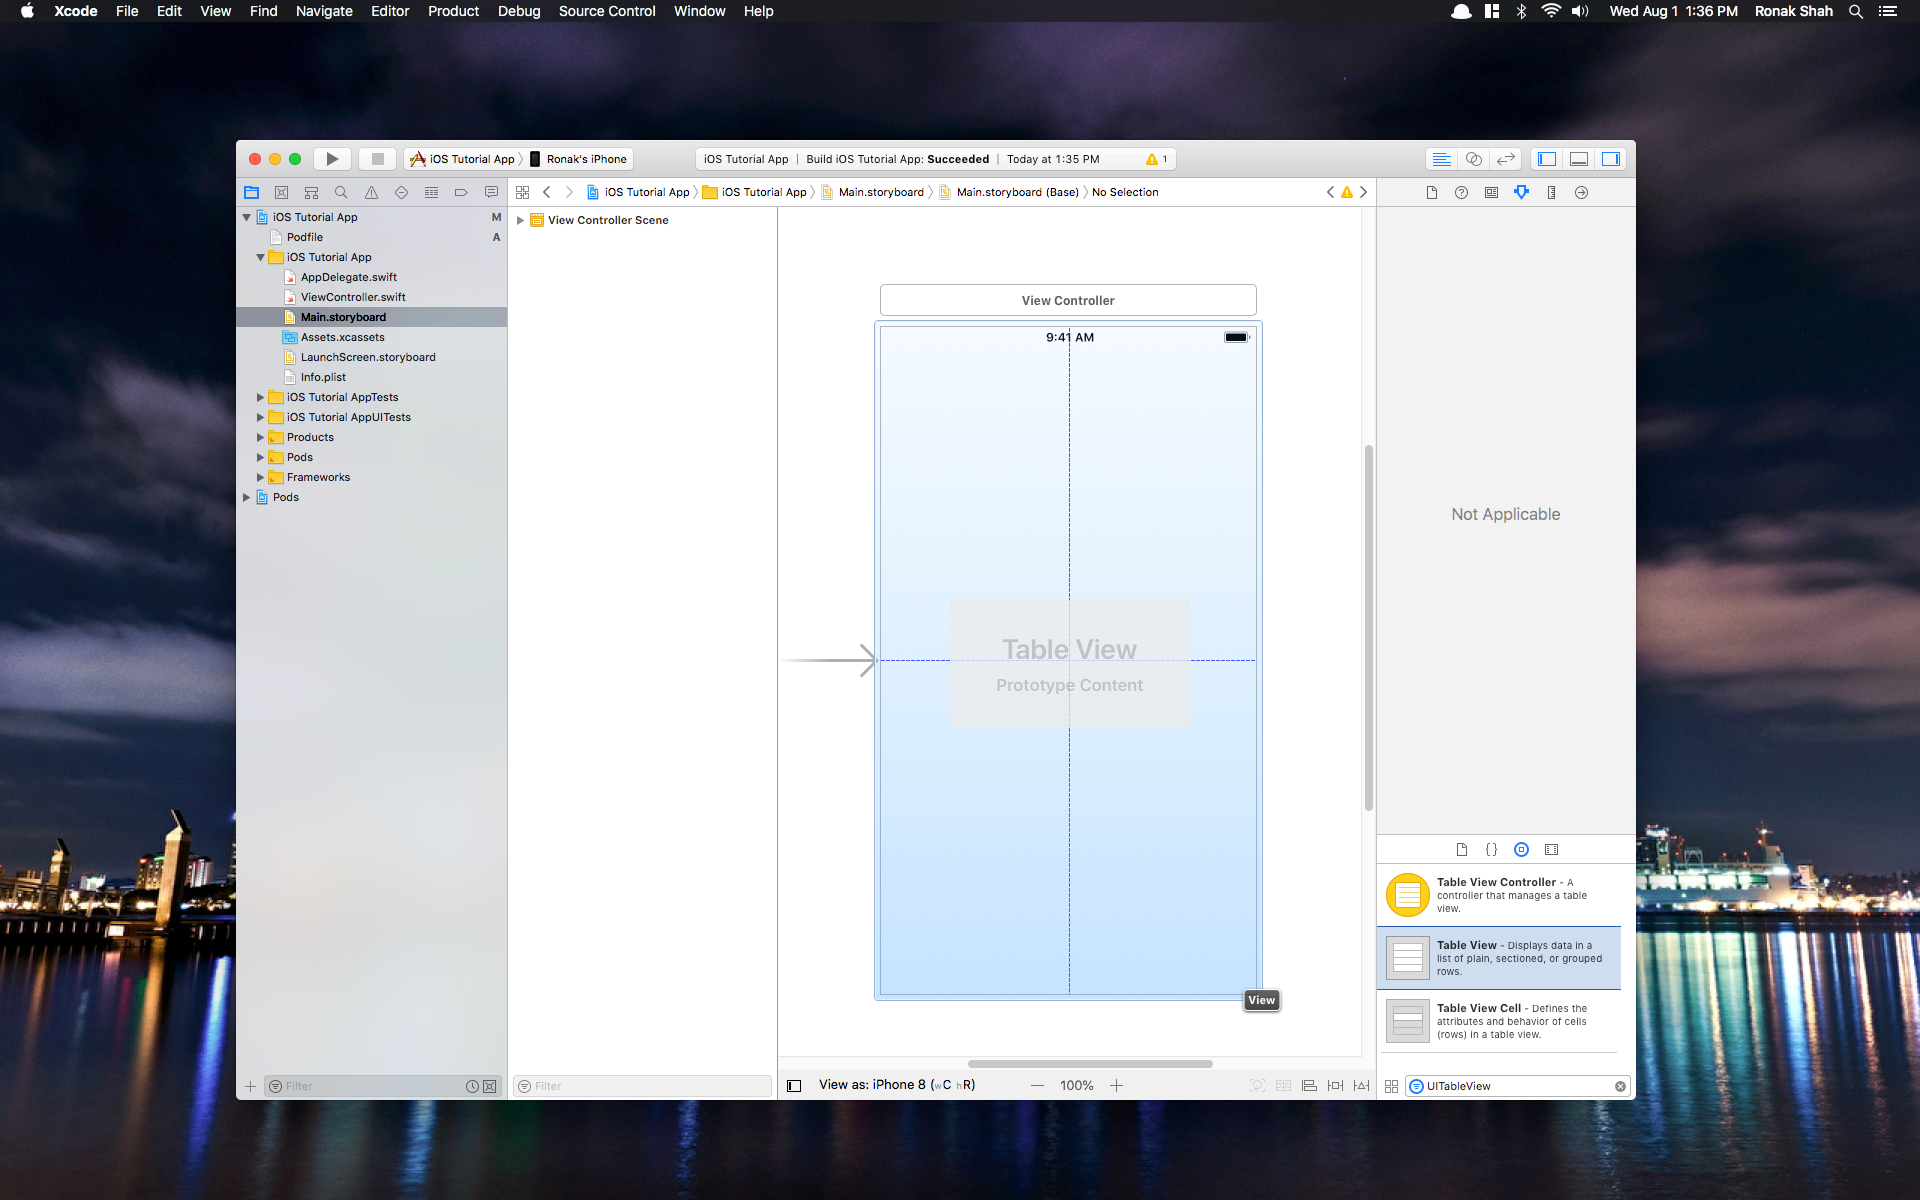
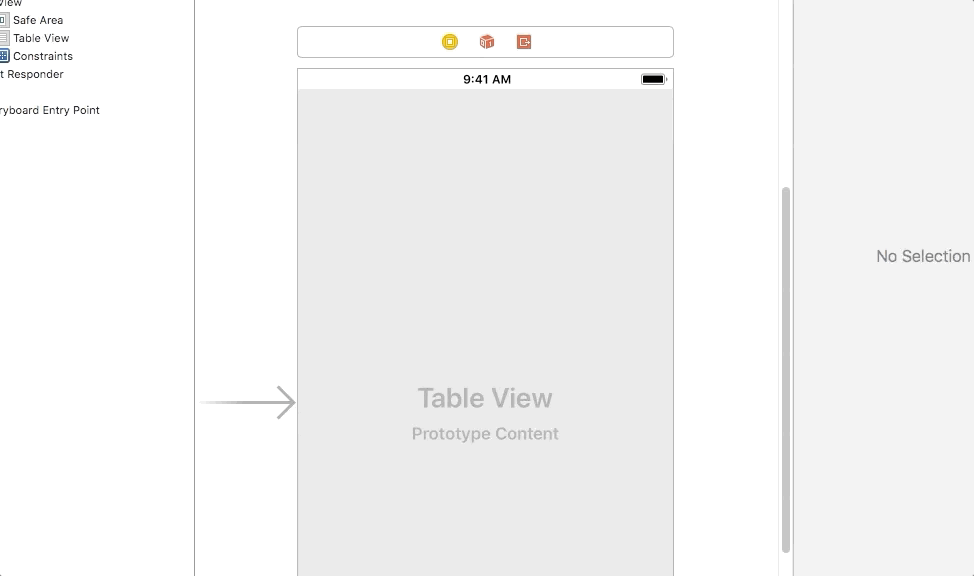
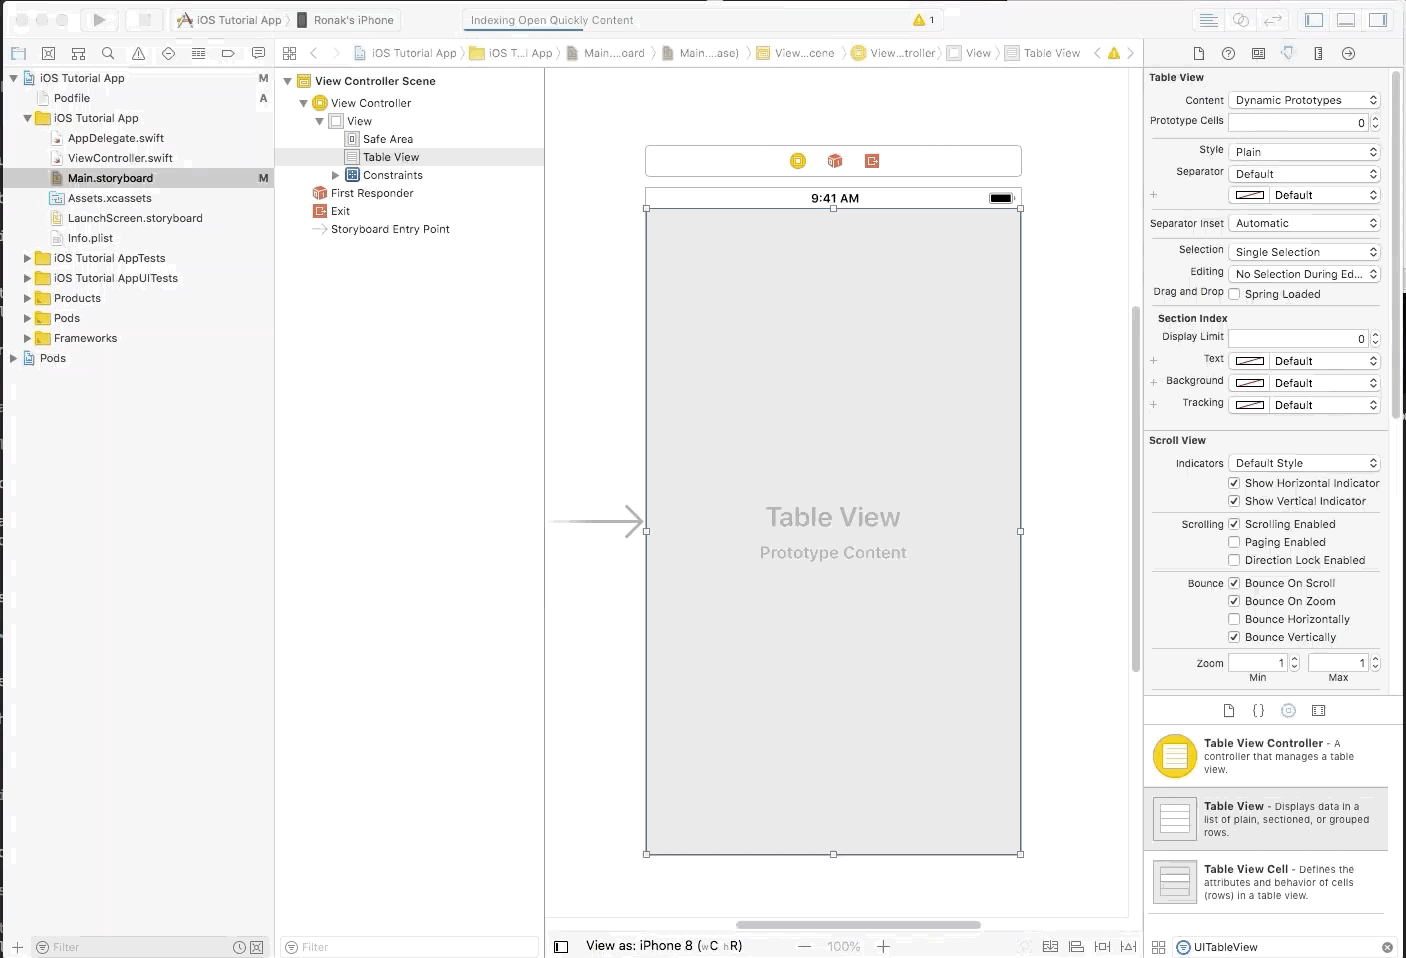
We'll start by creating the UI For our Project. Open up Main.storyboard from the side menu, and drag a UITableView object from the objects inspector into the view controller. (For Xcode 10, the inspector is located on the top)
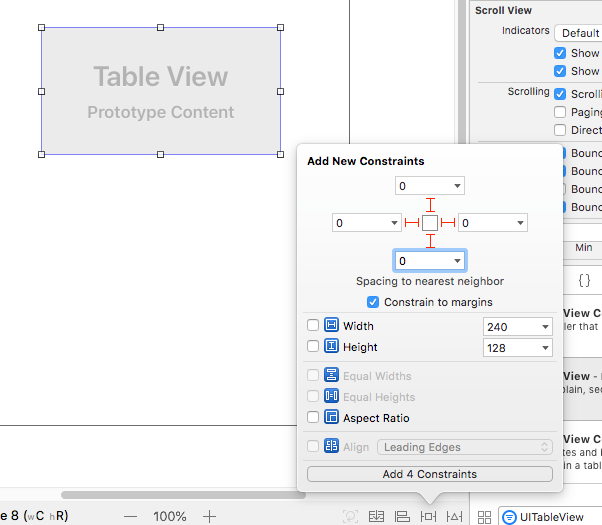
After adding it, click on the table view, then the Constraints Inspector on the bottom, and set the following Constraints (0 on all edges)
After this, hold the control key and drag from the table view to the view controller symbol (2 times). Select Data Source and Delegate.
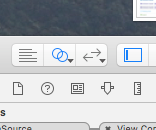
Next, we'll need to link the tableview to our view controller. Click the Two Circles Icon on the top right,
and control drag the tableview to create a new outlet. Call it tableView.
After all of this, we can close the second window (there should be an X), and open up ViewController.swift
Change the contents of ViewController.swift to look like the below code:
A few things to note:
- When we create the ZestySwiftContentEndpointWrapper, we need to specify a domain. For development purposes, we recommend using the Zesty-Provided Preview Domain.
- In our
getData()function, we need to specify the array zuid (eg.8-abcd-1234, 6-abcd-1234) of the dataset we created,Coupons.
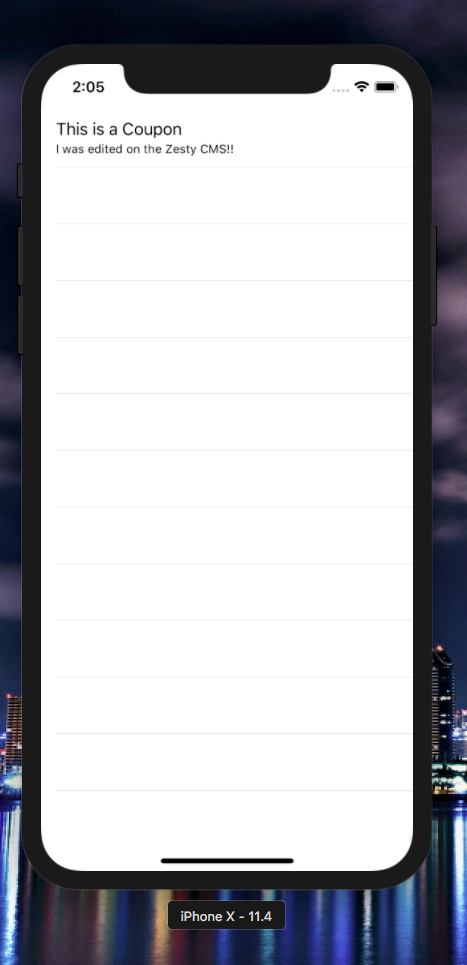
After filling in those details, run your project on the iOS Simulator (⌘R), and see the magic happen!
The Final Product
Next Steps
Now that you know how to use the BasicJSONAPI with iOS / Swift, you can do incredible things!
I recommend checking out the example ZestyBurger iOS App for a more complex example, which uses the getCustomJSONData functions that the library provides.
Connect with Content Experts
Book a free 15-minute consultation with a content expert. Discuss your application, pain points and requirements. Understand how Zesty's lower total cost of ownership, features, functionality can elevate your business by creating extraordinary digital experiences.
Trusted By


G2 MOMENTUM LEADER