How to Set Up Internationalization (i18n)
Setting up internationalization allows users to add multiple languages to their instance.
Overview
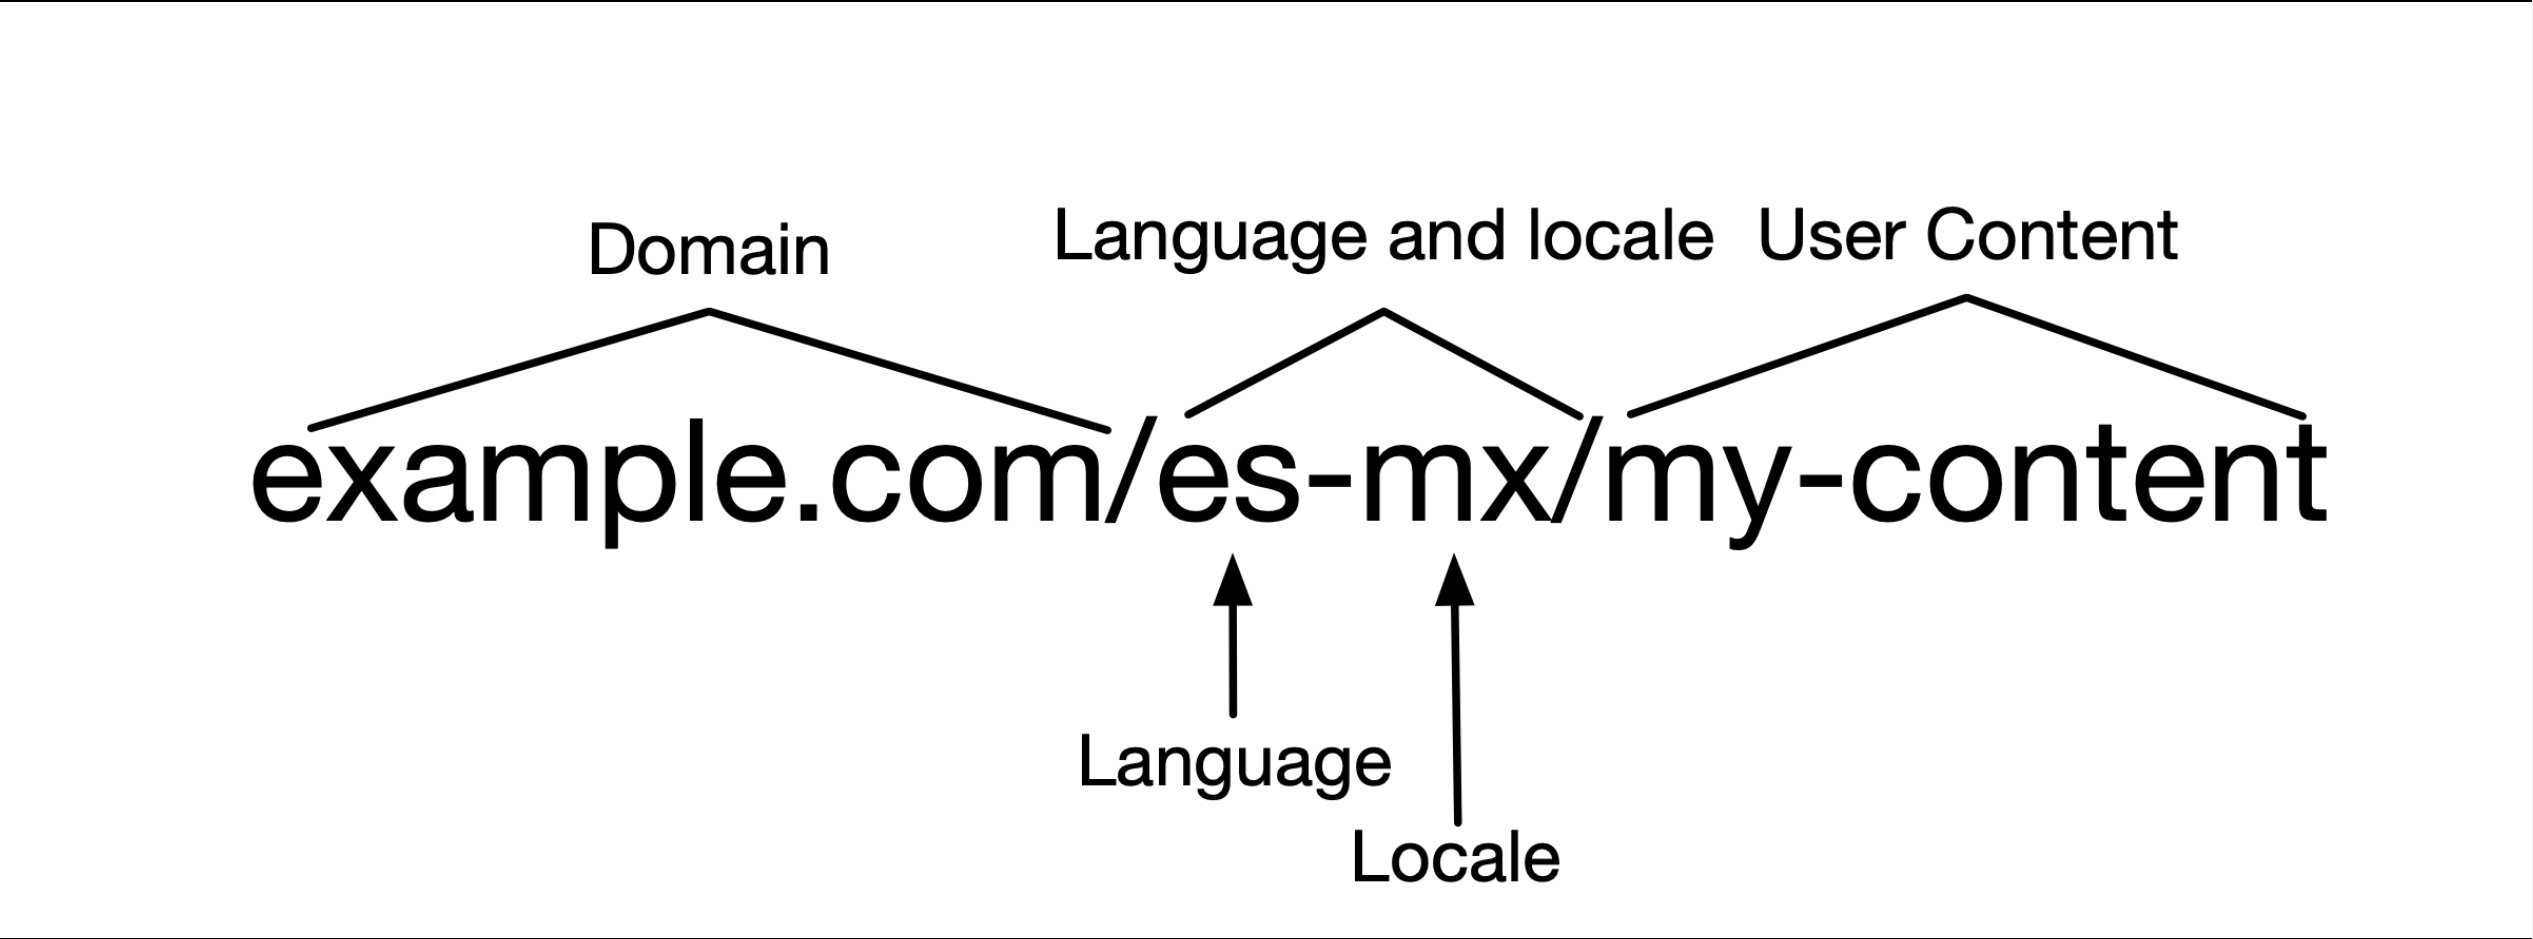
Internationalization (i18n) refers to adapting your instance's into another language. This gives sites with an international audience the ability to create content in different languages with the click of a button. Note: By default all Zesty.io instances are in English. Contact support@zesty.io if want to make an instance with a different default language. When languages are added the muti-lang URLs will contain both the language and locale as applicable. For example, es (Spanish) has variants by locale such as CO (Columbia), ES (Spain), MX (Mexico), UY (Uruguay) and so on; the URL will be in the form of domain/language-locale/my-content e.g., example.com/es-mx/my-content.
Zesty.io's multi-lang will not translate the page for you. However, it will add the language and locale to the URL.
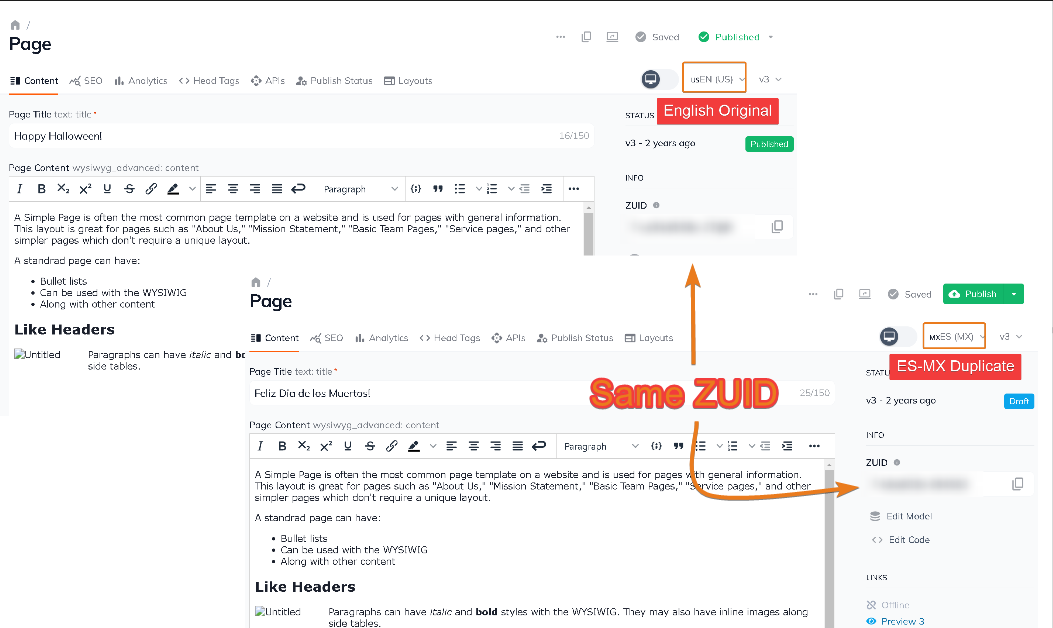
Once a language is added the template is duplicated. Although languages share a template they have separate ZUIDs - in other words - duplicates do not share their ZUID with the original language. For example, the template for English will have the same template as Spanish, however, each one will have their own ZUID.
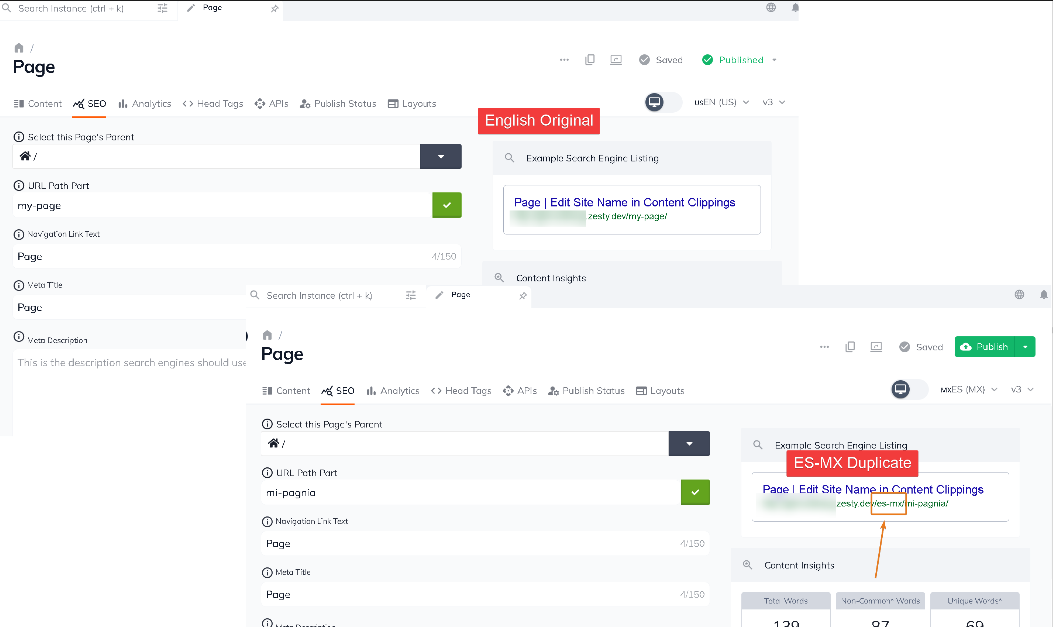
And the item's path will be prepended with the language and locale except for the original language.
Deleting one multi-lang item will delete all of its siblings.
For example, if you have an item in en-US, es-MX, and fr-FR and you delete the es-MX item, its en-US and fr-FR siblings will also be deleted.
Before you begin
Adding languages to your instance requires using our API to both add and activate languages. If you're not familiar with using APIs there are many resources online to support your learning, such as Mozilla Developer Network.
Steps for implementing i18n
Step 1: Adding languages
Follow our API documentation to add a language.
Multiple languages cannot be added with a single POST. Every language that you add requires a separate POST. For example, if you wanted to add es-MX, es-ES, and es-UY - you'll need to do three (3) separate POSTs to add each language.
Step 2: Activating languages
Follow our API documentation to activate a language. **Languages must be activated in order to be viewed on a live site.
Multiple languages cannot be activated with a single PUT. Every language that you want to activate requires a separate PUT.
Creating Content in Other Languages
Once internationalization is setup, a language selector dropdown will appear in each content item that allows you to select the language.
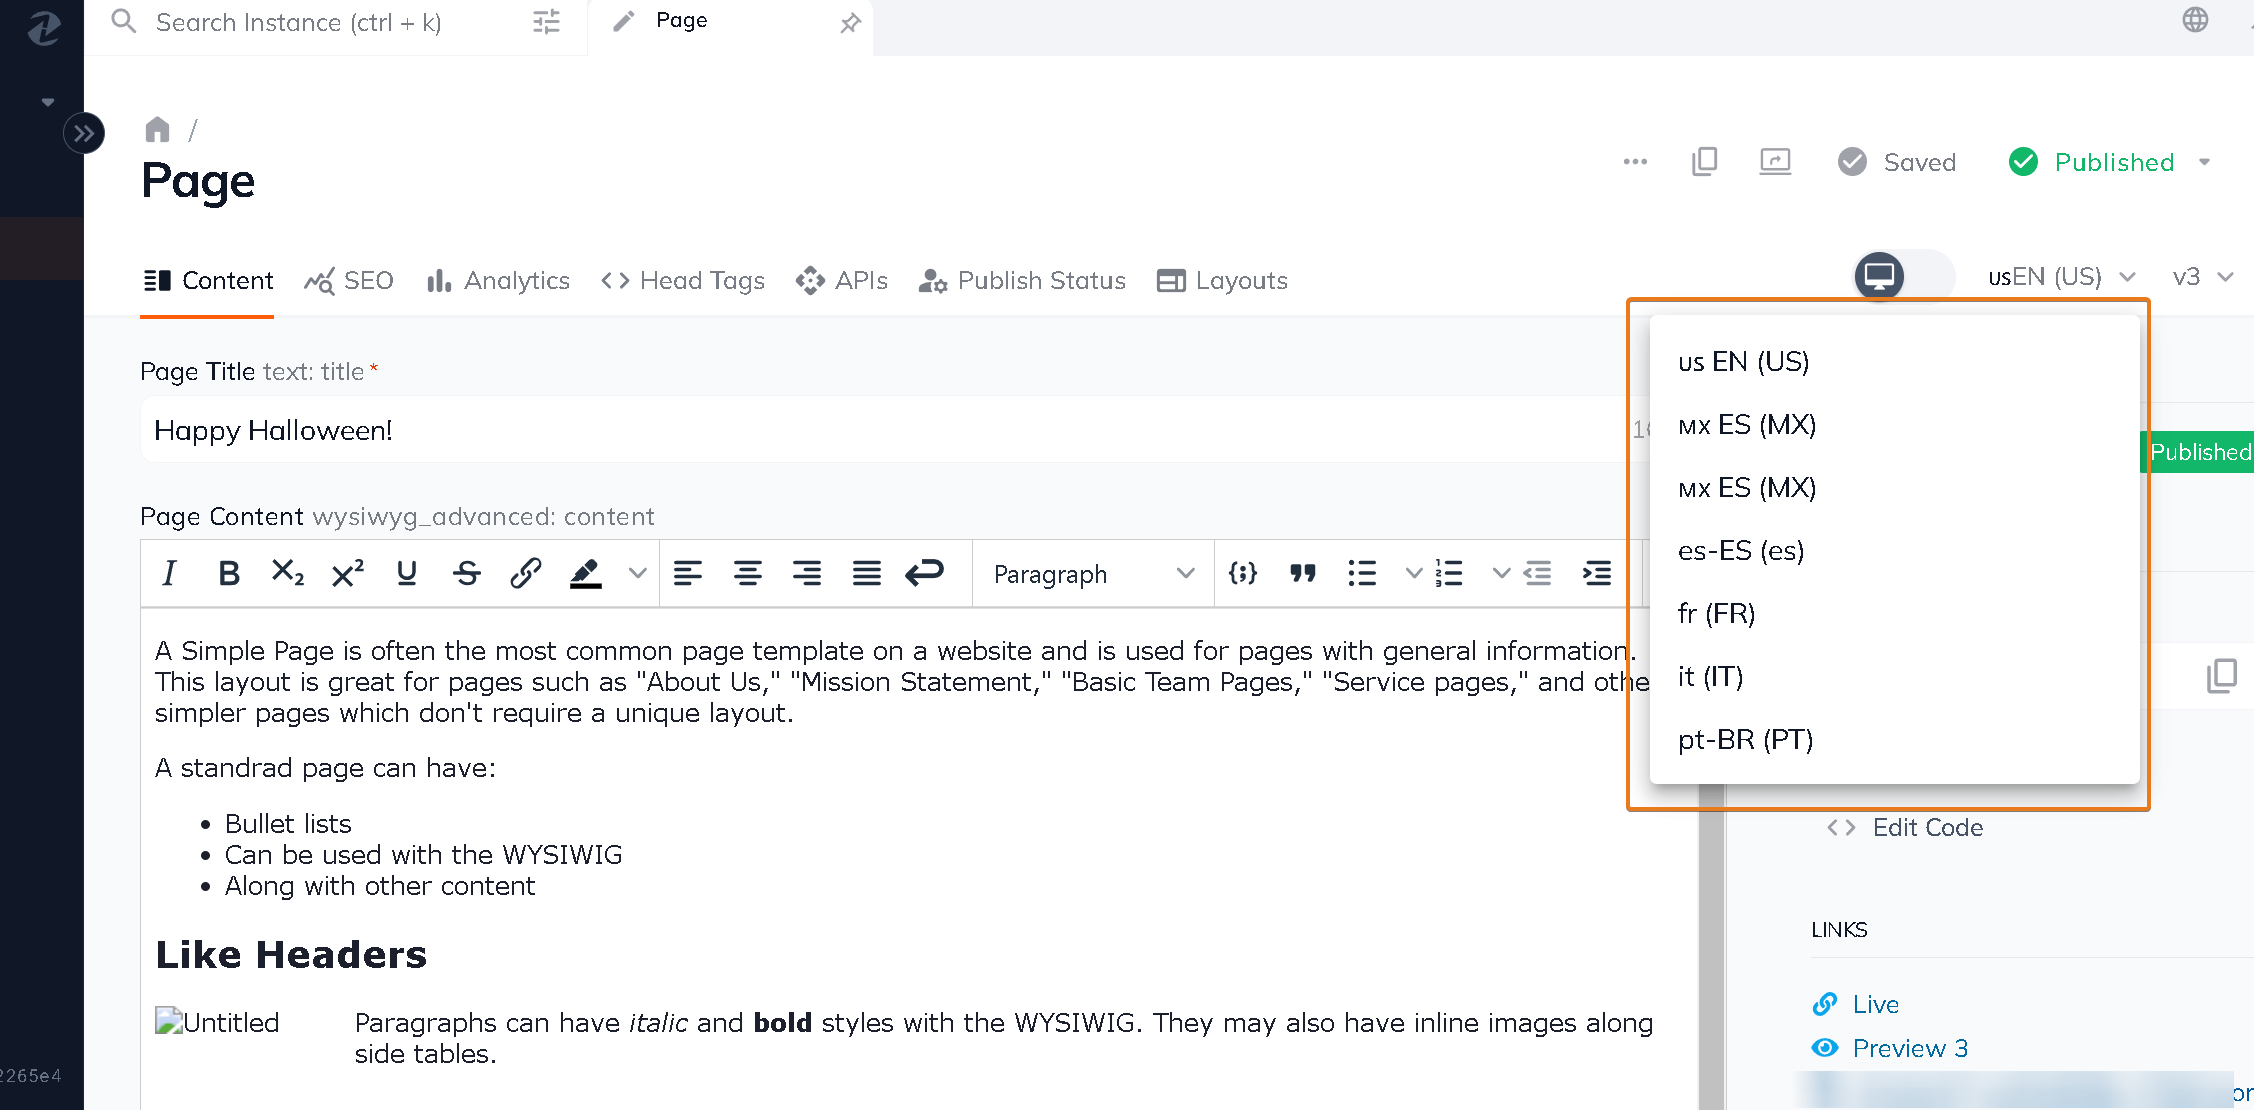
Select the language/locale option from the dropdown. Once selected, you will be able to edit content for that item in the chosen language/locale. Each language/locale will have its own versions and ZUID.

Connect with Content Experts
Book a free 15-minute consultation with a content expert. Discuss your application, pain points and requirements. Understand how Zesty's lower total cost of ownership, features, functionality can elevate your business by creating extraordinary digital experiences.
Trusted By


G2 MOMENTUM LEADER